Step-by-step Integration
Step 1. Basic Integration (Platform) [30 minutes]
- Create an account at Balancy.
-
Once you see the dashboard, create a new game or use our Template (Recommended).
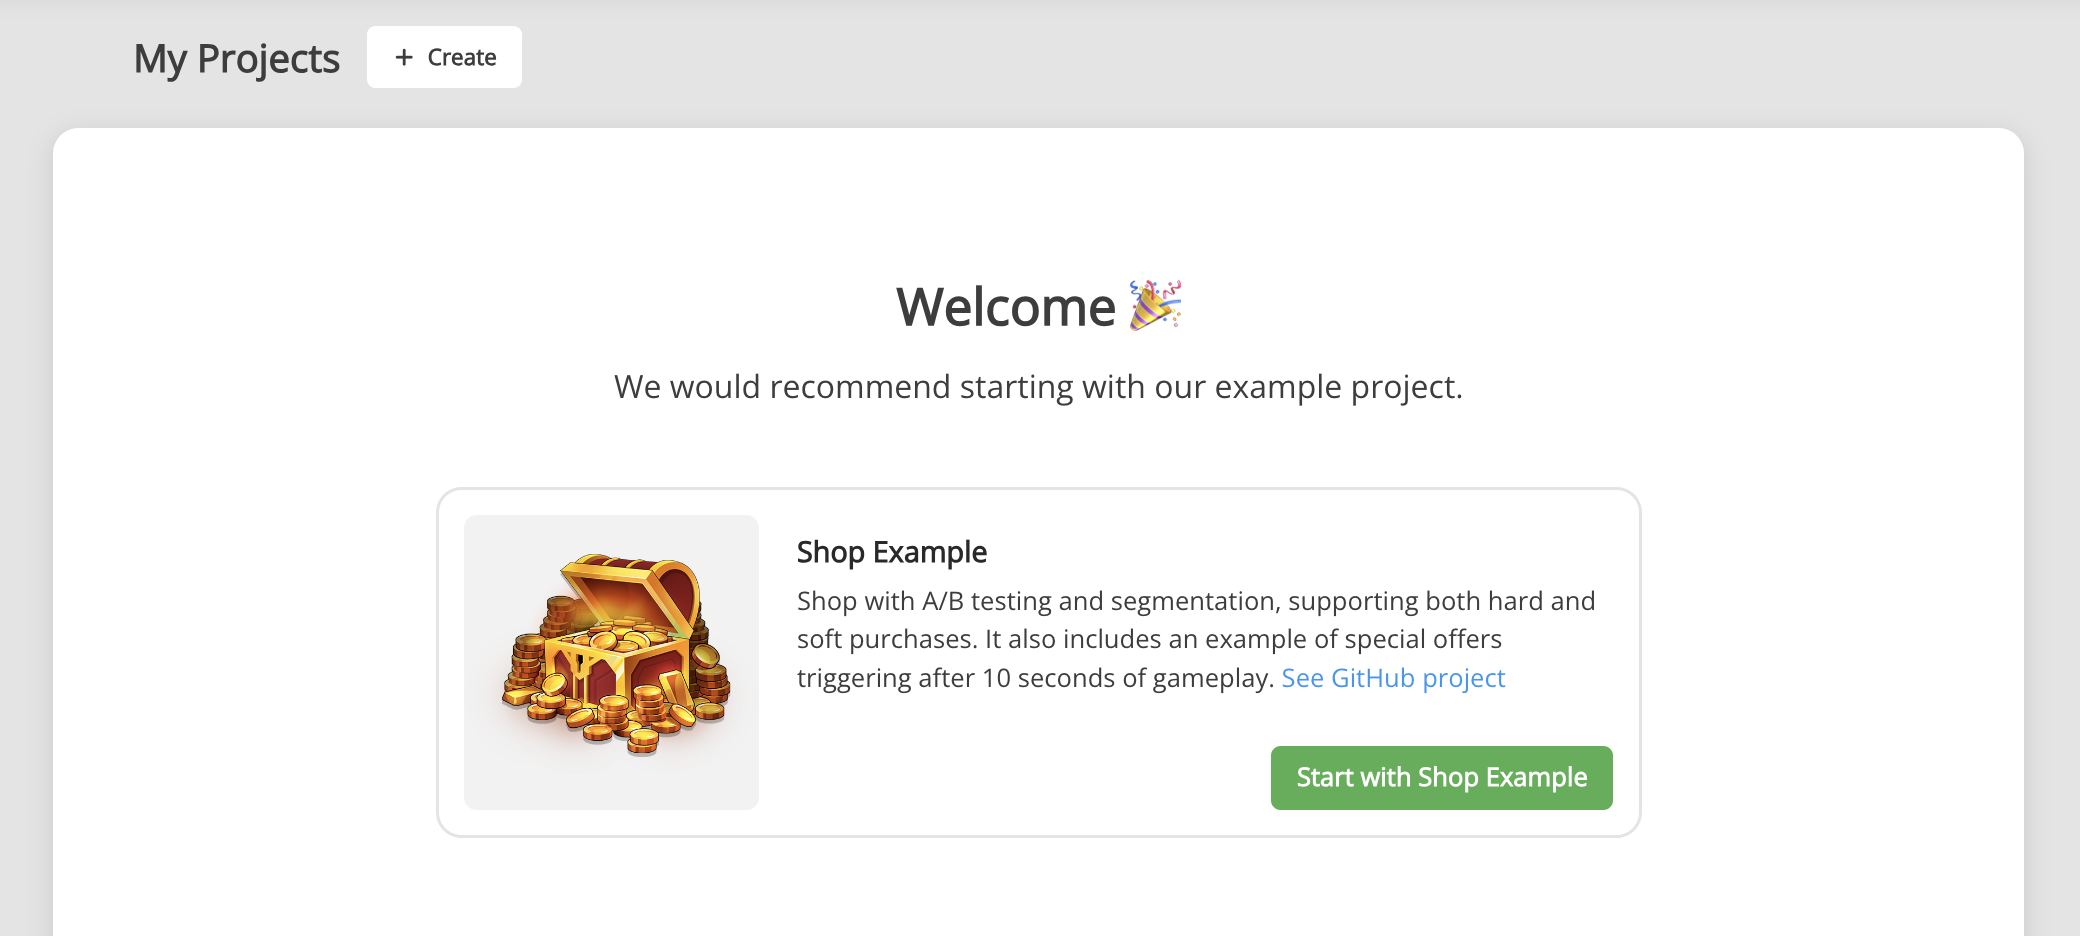
-
If you created a new game, install LiveOps package.
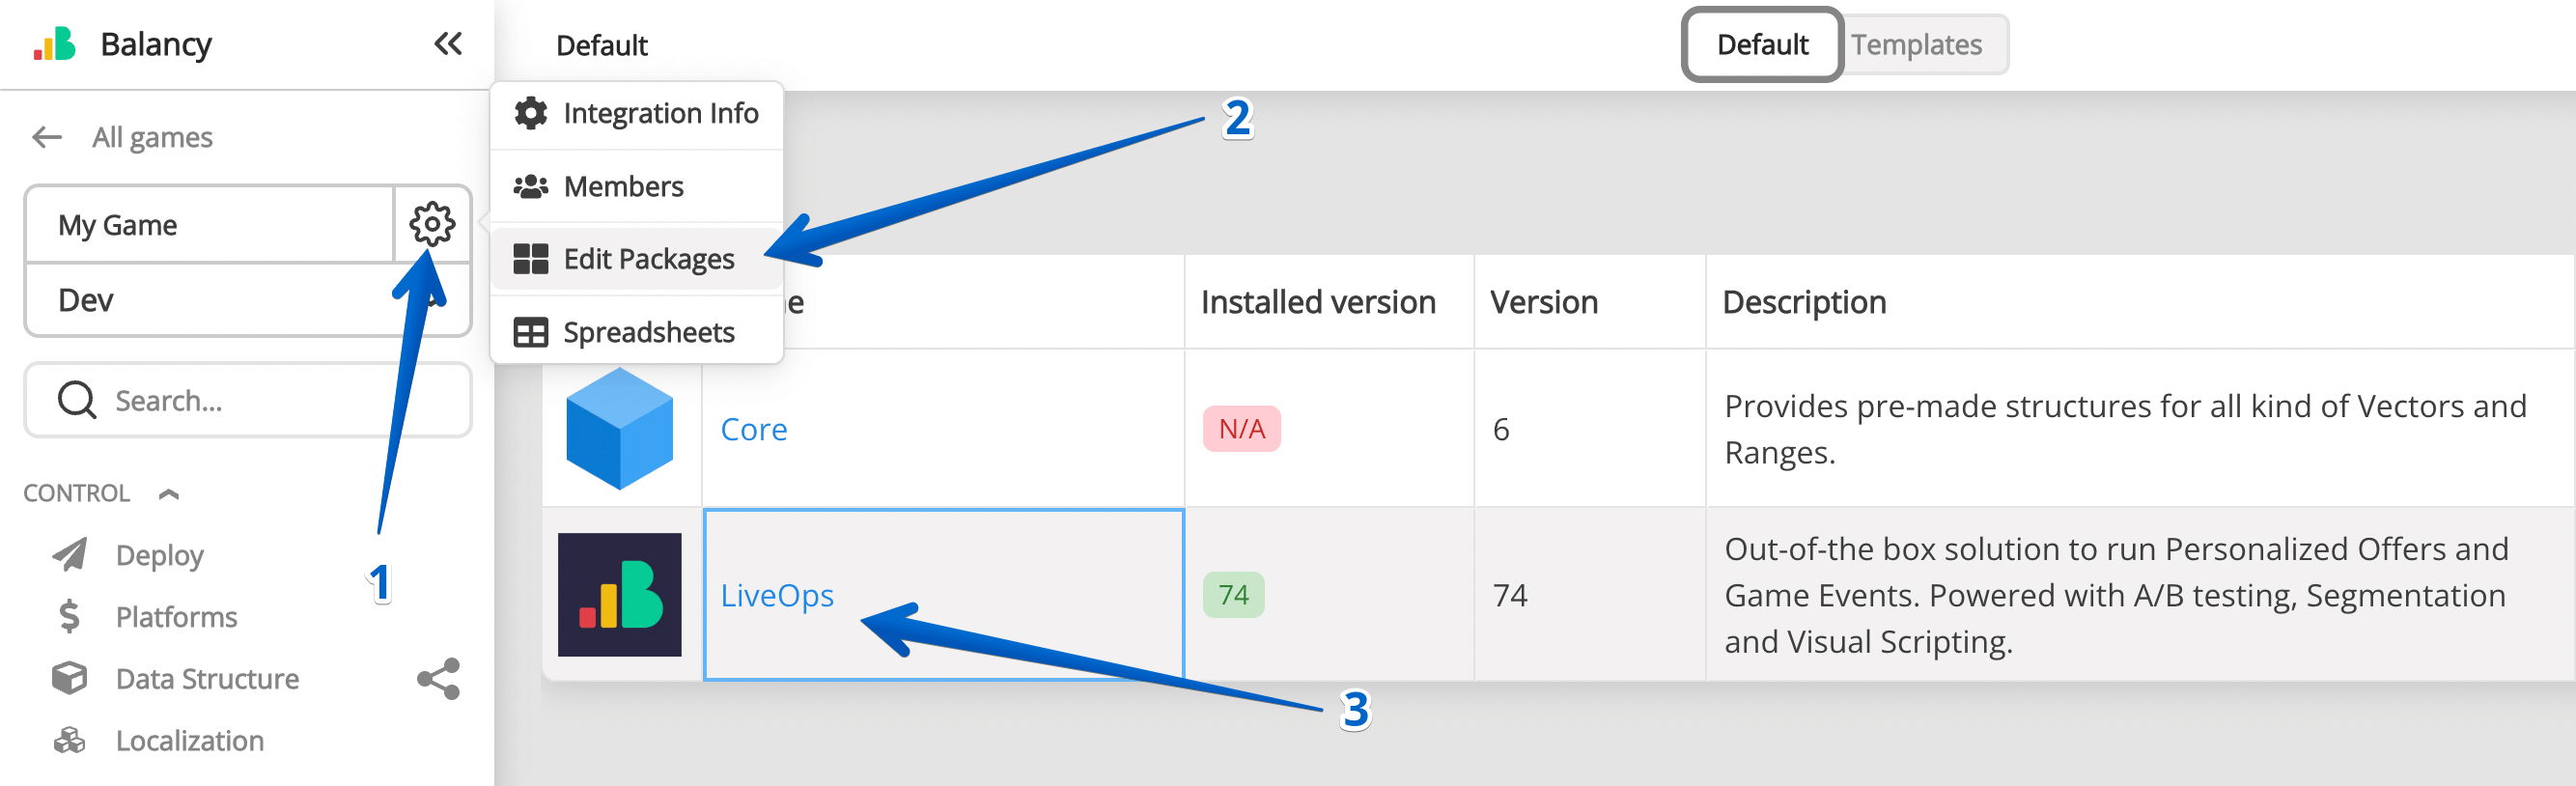
-
(Optional) Add team members to the project. It is possible to give personal read/write permissions to members.
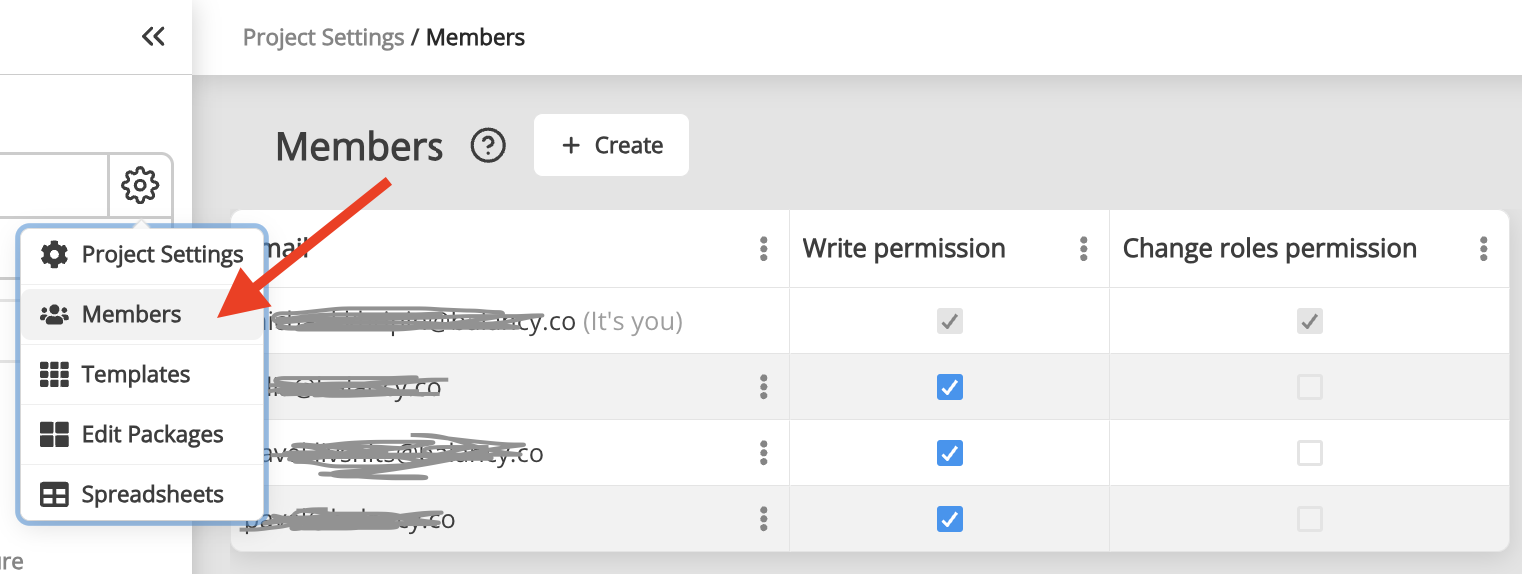
-
(Optional) Create a new template GameItem to define your game item's properties.
- Import your game items using our GoogleSheets Synchronisation or add items manually.
-
Step 2. Basic Integration (Game) [10 minutes]
Dependencies
-
To start with Balancy you need to install Newtonsoft.Json library to work with jsons. You can check instruction. But basically you just need to add dependency
com.unity.nuget.newtonsoft-jsonin Package Manager.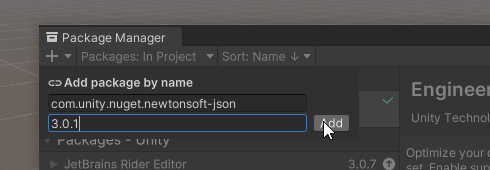
-
Download the latest version of the plugin.
- Import the Balancy plugin to Unity project.
-
When the compilation is complete, open Tools ► Balancy ► Config and authorise with the same login/password you used on the Balancy platform.
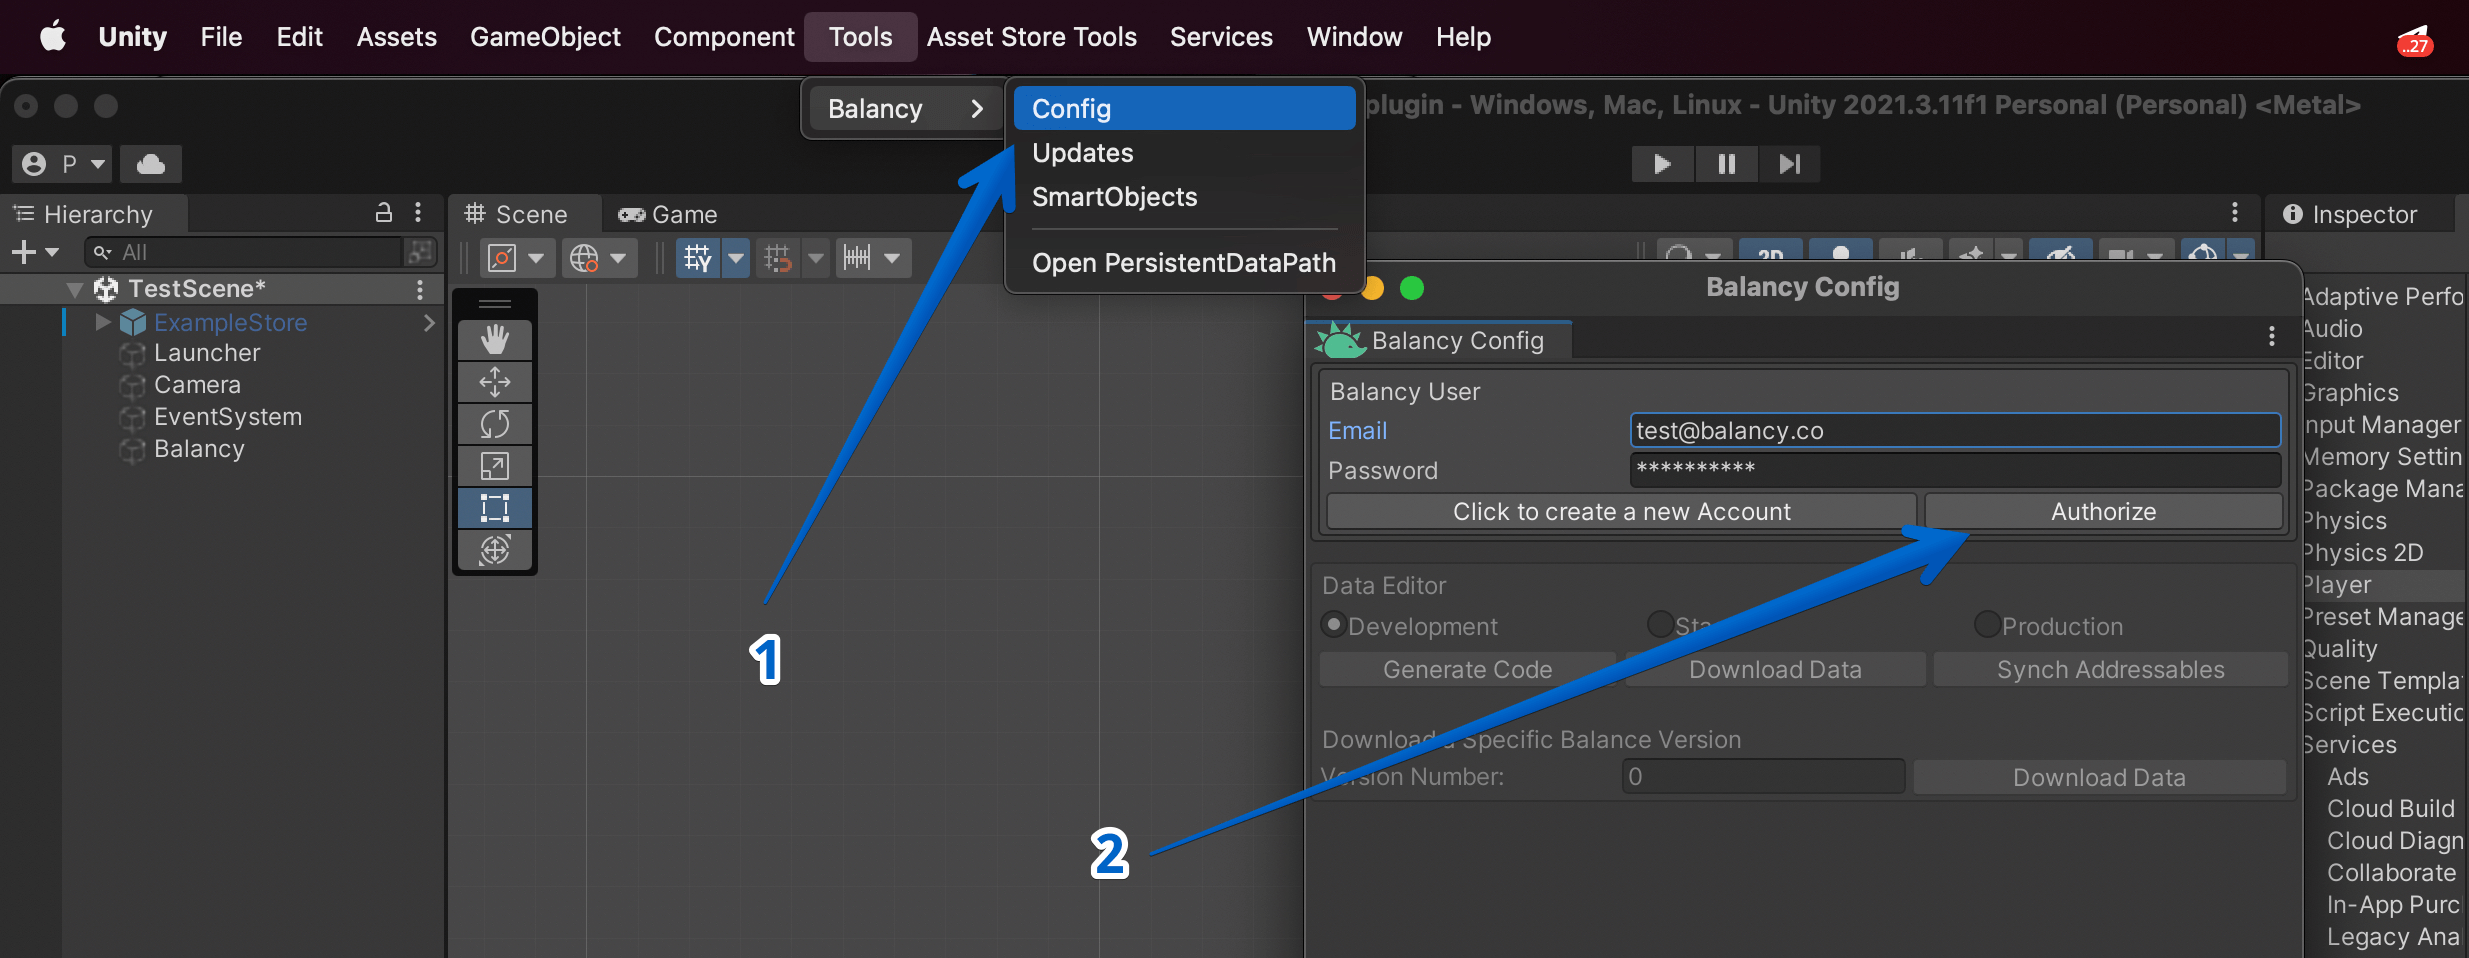
-
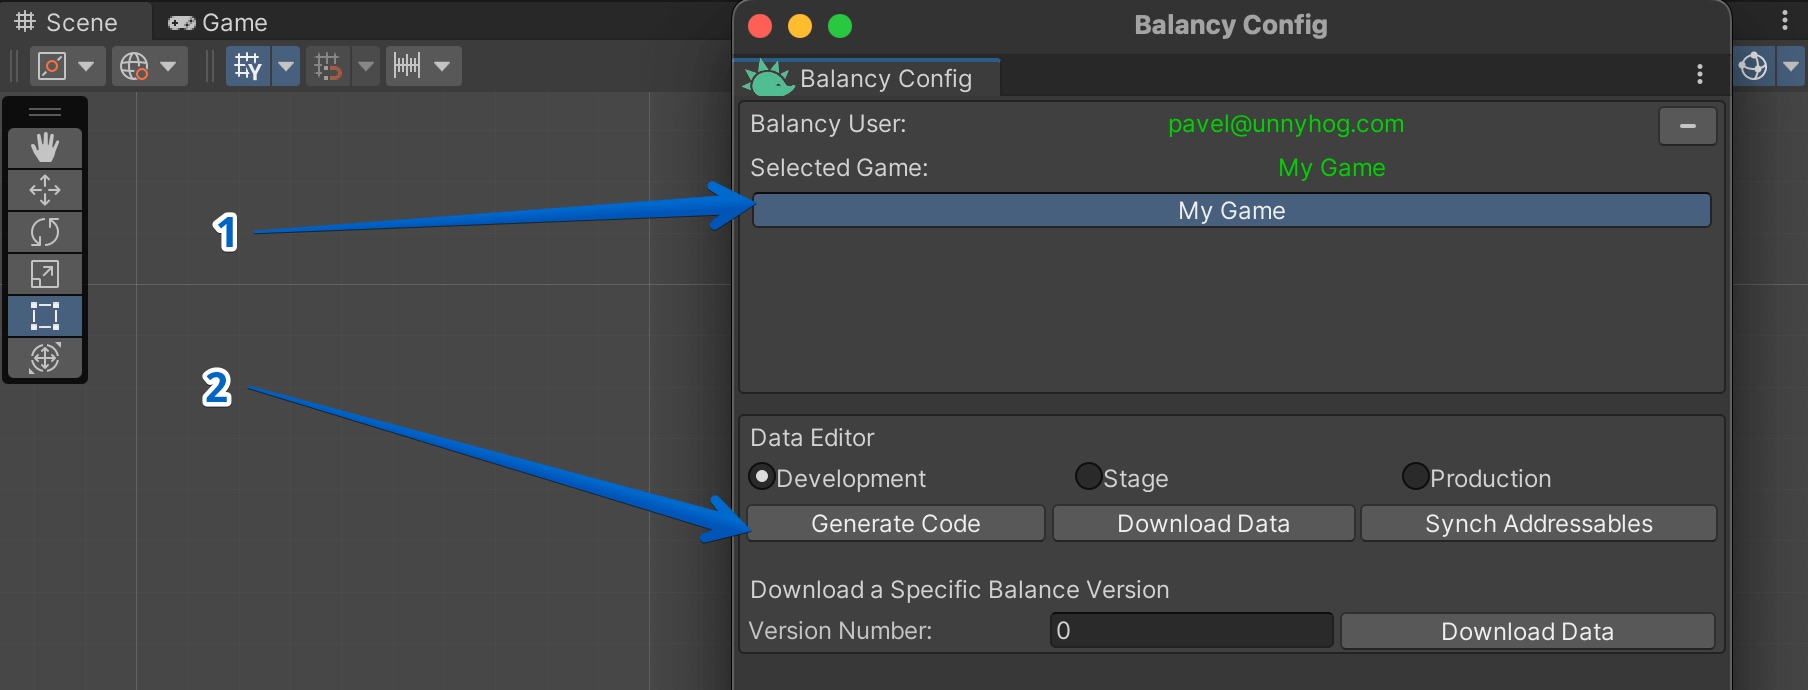
Select the game you need and click on Generate Code.
-
Init Balancy using the following code:
Balancy.Main.Init(new Balancy.AppConfig {
    ApiGameId = YOUR_GAME_ID,
    PublicKey = YOUR_PUBLIC_KEY,
    Environment = Balancy.Constants.Environment.Development,
    OnReadyCallback = responseData => { Debug.Log("Balancy Initialized: " + responseData.Success); }
});
You can find YOUR_GAME_ID and YOUR_PUBLIC_KEY in the Balancy dashboard:
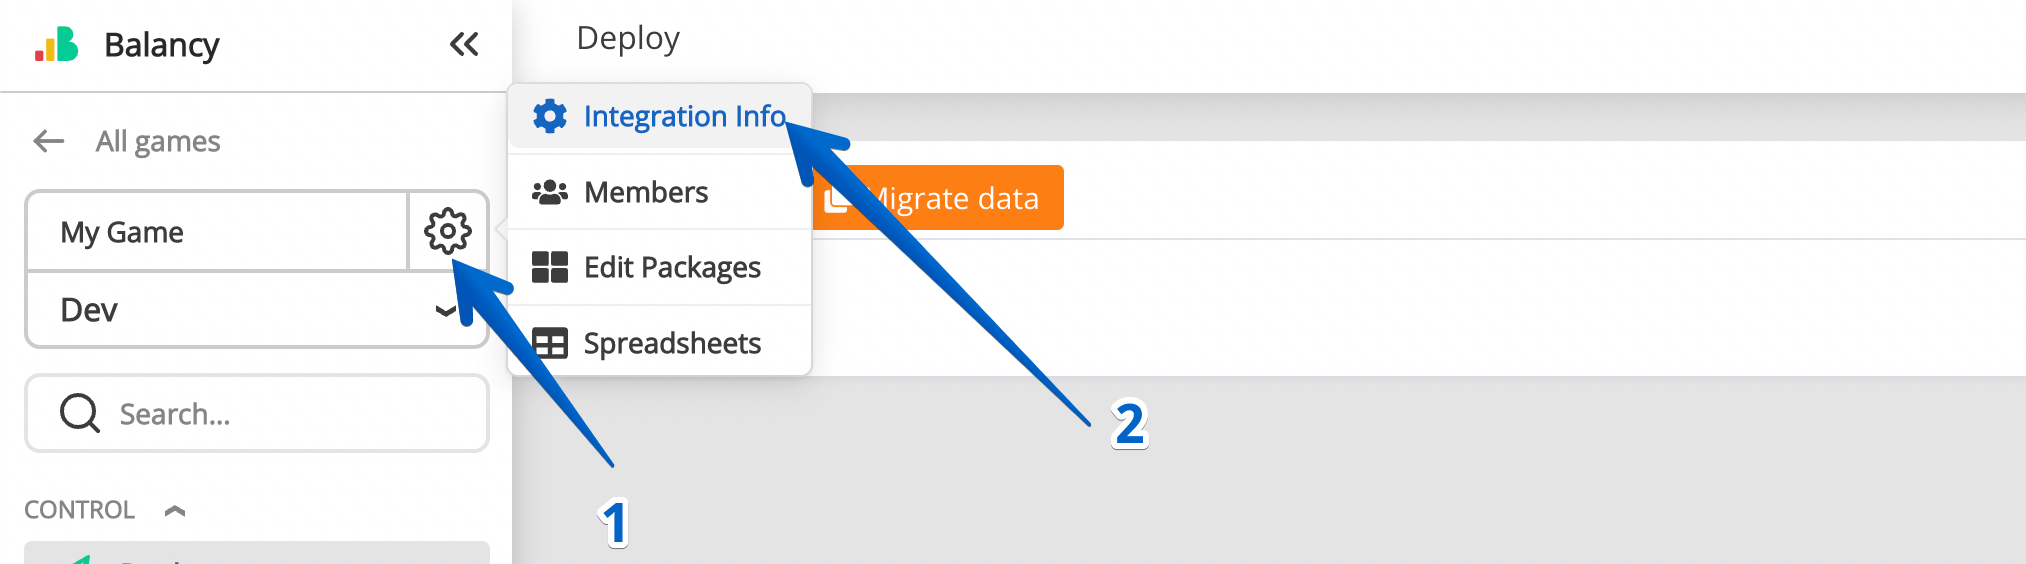
-
We strongly recommend to keep
Reload Domaincheckbox enabled in Unity's Play Mode settings, otherwise Balancy plugin’s behaviour can become unpredictable when using Play Mode in the editor: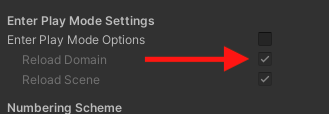
-
In the OnReadyCallback print all the Items your game has. You can read about the access to all the data here.
Balancy.Main.Init(new Balancy.AppConfig {
    ApiGameId = YOUR_GAME_ID,
    PublicKey = YOUR_PUBLIC_KEY,
    Environment = Balancy.Constants.Environment.Development,
    OnReadyCallback = responseData => {
        Debug.Log("Balancy Initialized: " + responseData.Success);

        var defaultItems = DataManager.SmartObjects.Items; //<- use it if you store your items in our default Items section
        var customItems = DataEditor.GameItems; //<- use it if created a custom GameItem

        var allItems = defaultItems; //I'll assume we use default items
        Debug.Log($"Total items count = {allItems.Count}");

        foreach (var item in allItems)
            Debug.Log($"{item.Name} : {item.MaxStack}");
    }
});
Step 3. LiveOps Integration (Platform) [30 minutes]
-
Create GameOffers
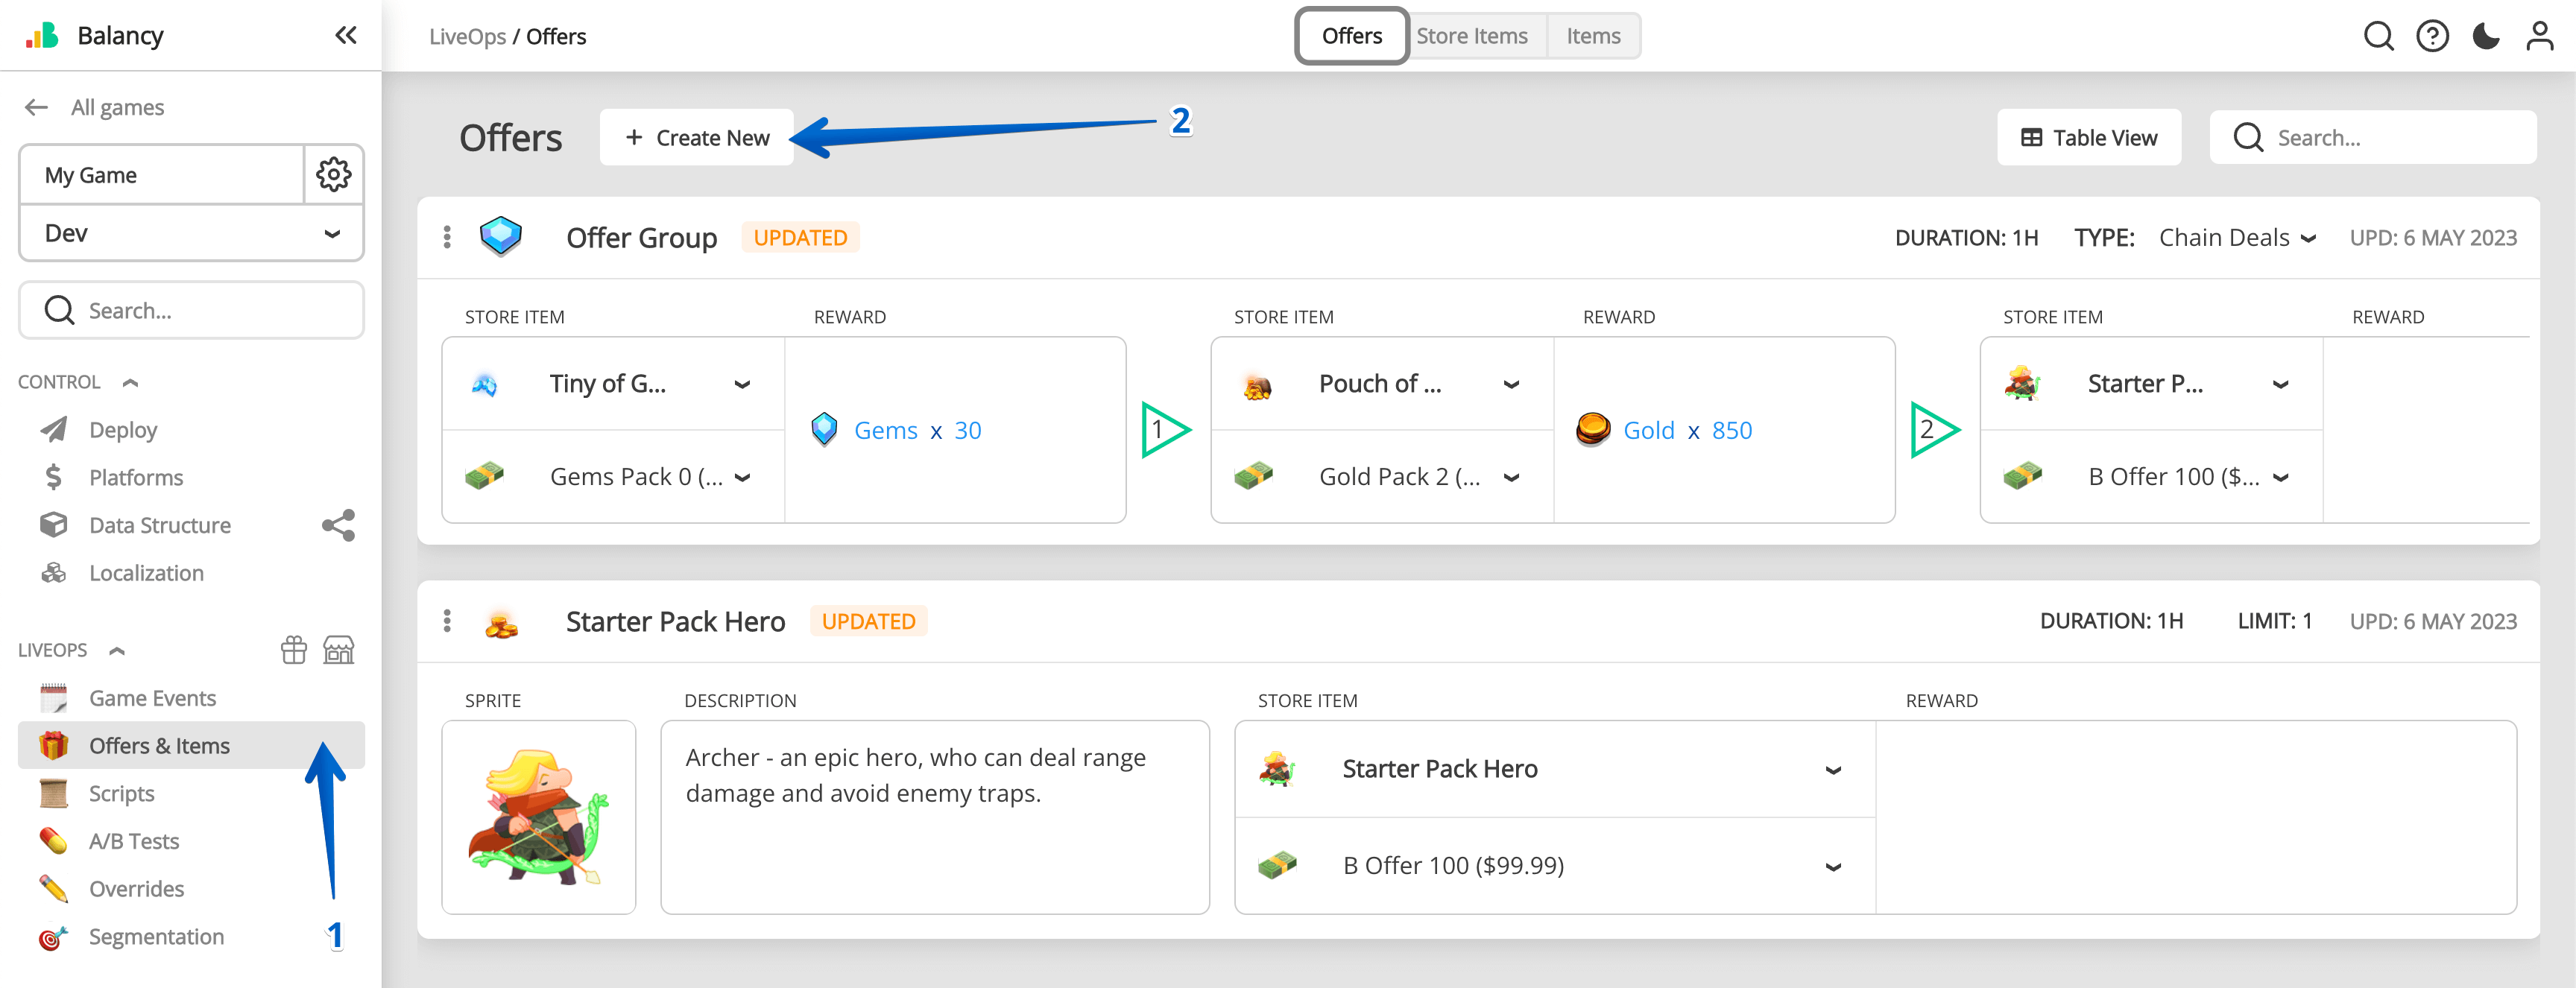
-
Create a Simple Script that will just activate an offer in 5 seconds time. In the Activate Offer node, pick one of the Game Offers you created before.
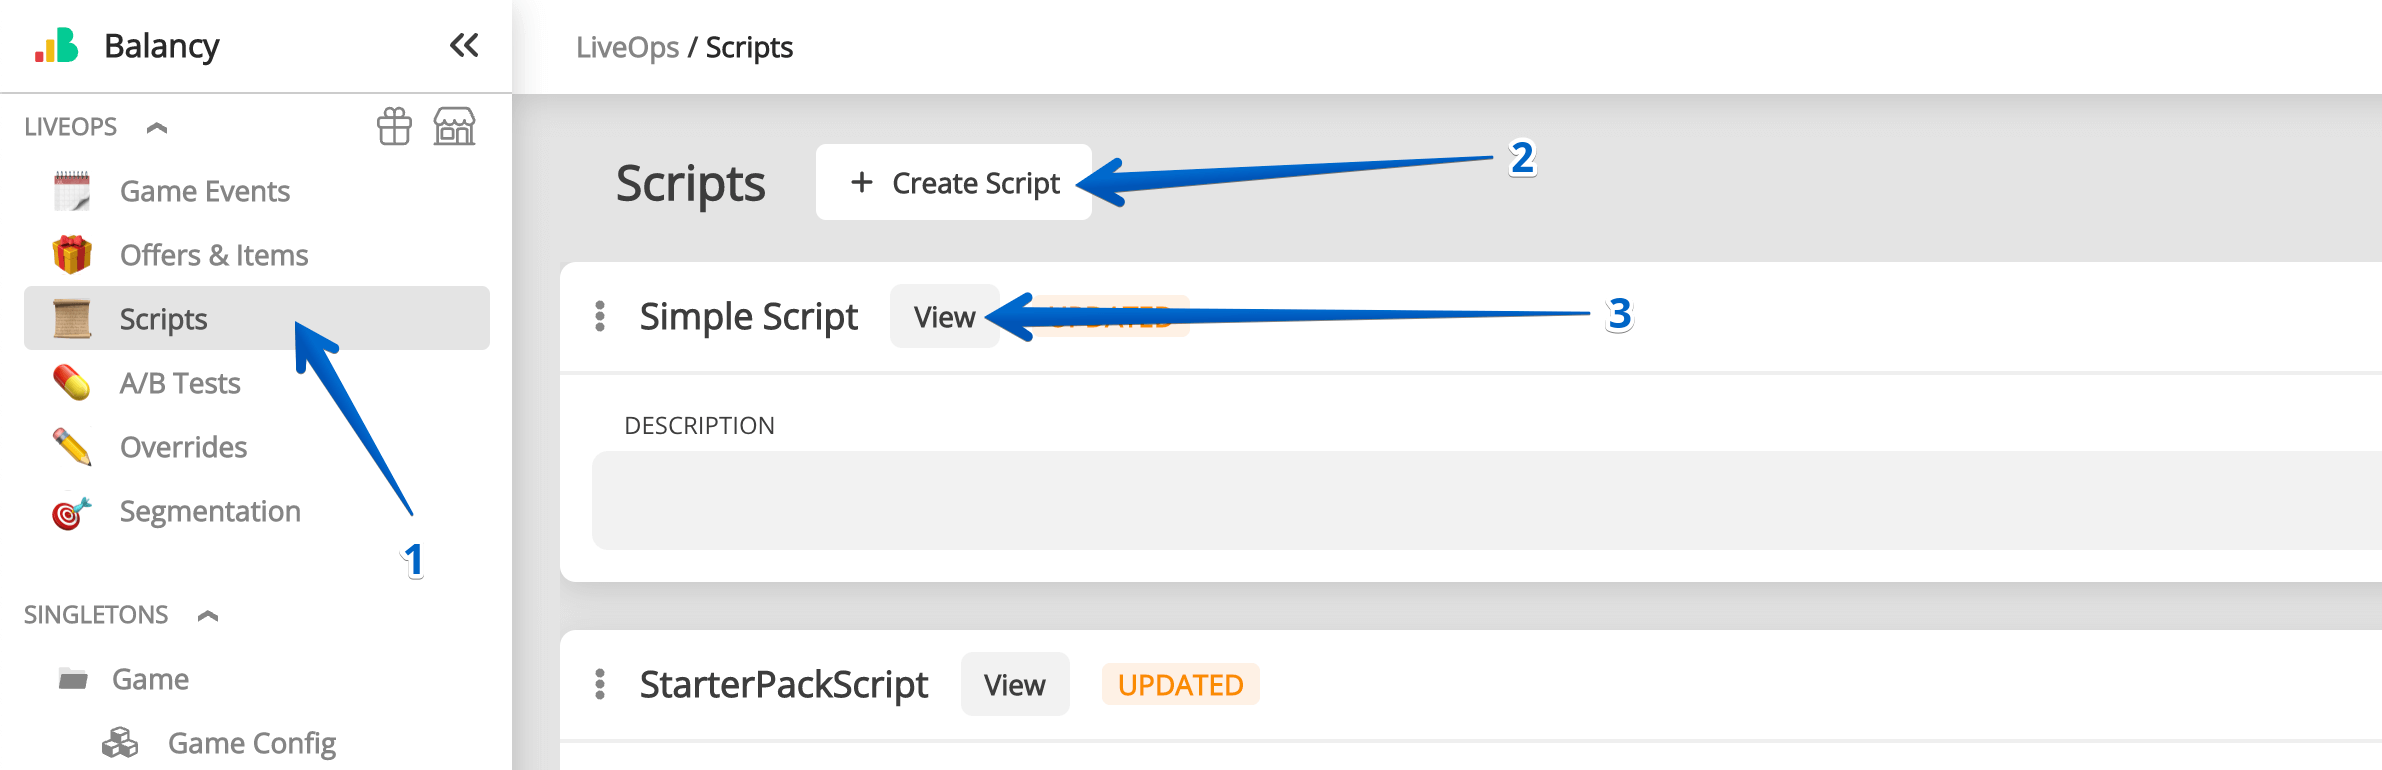
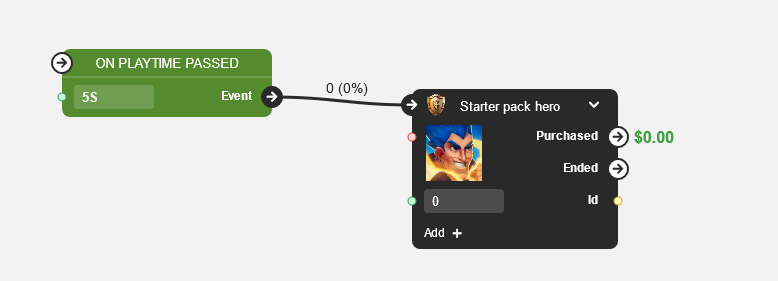
-
Create the Test Game Event and attach the Simple Script to it. Leaving Condition field empty means the Event will be launched as soon as a player launches the game.

-
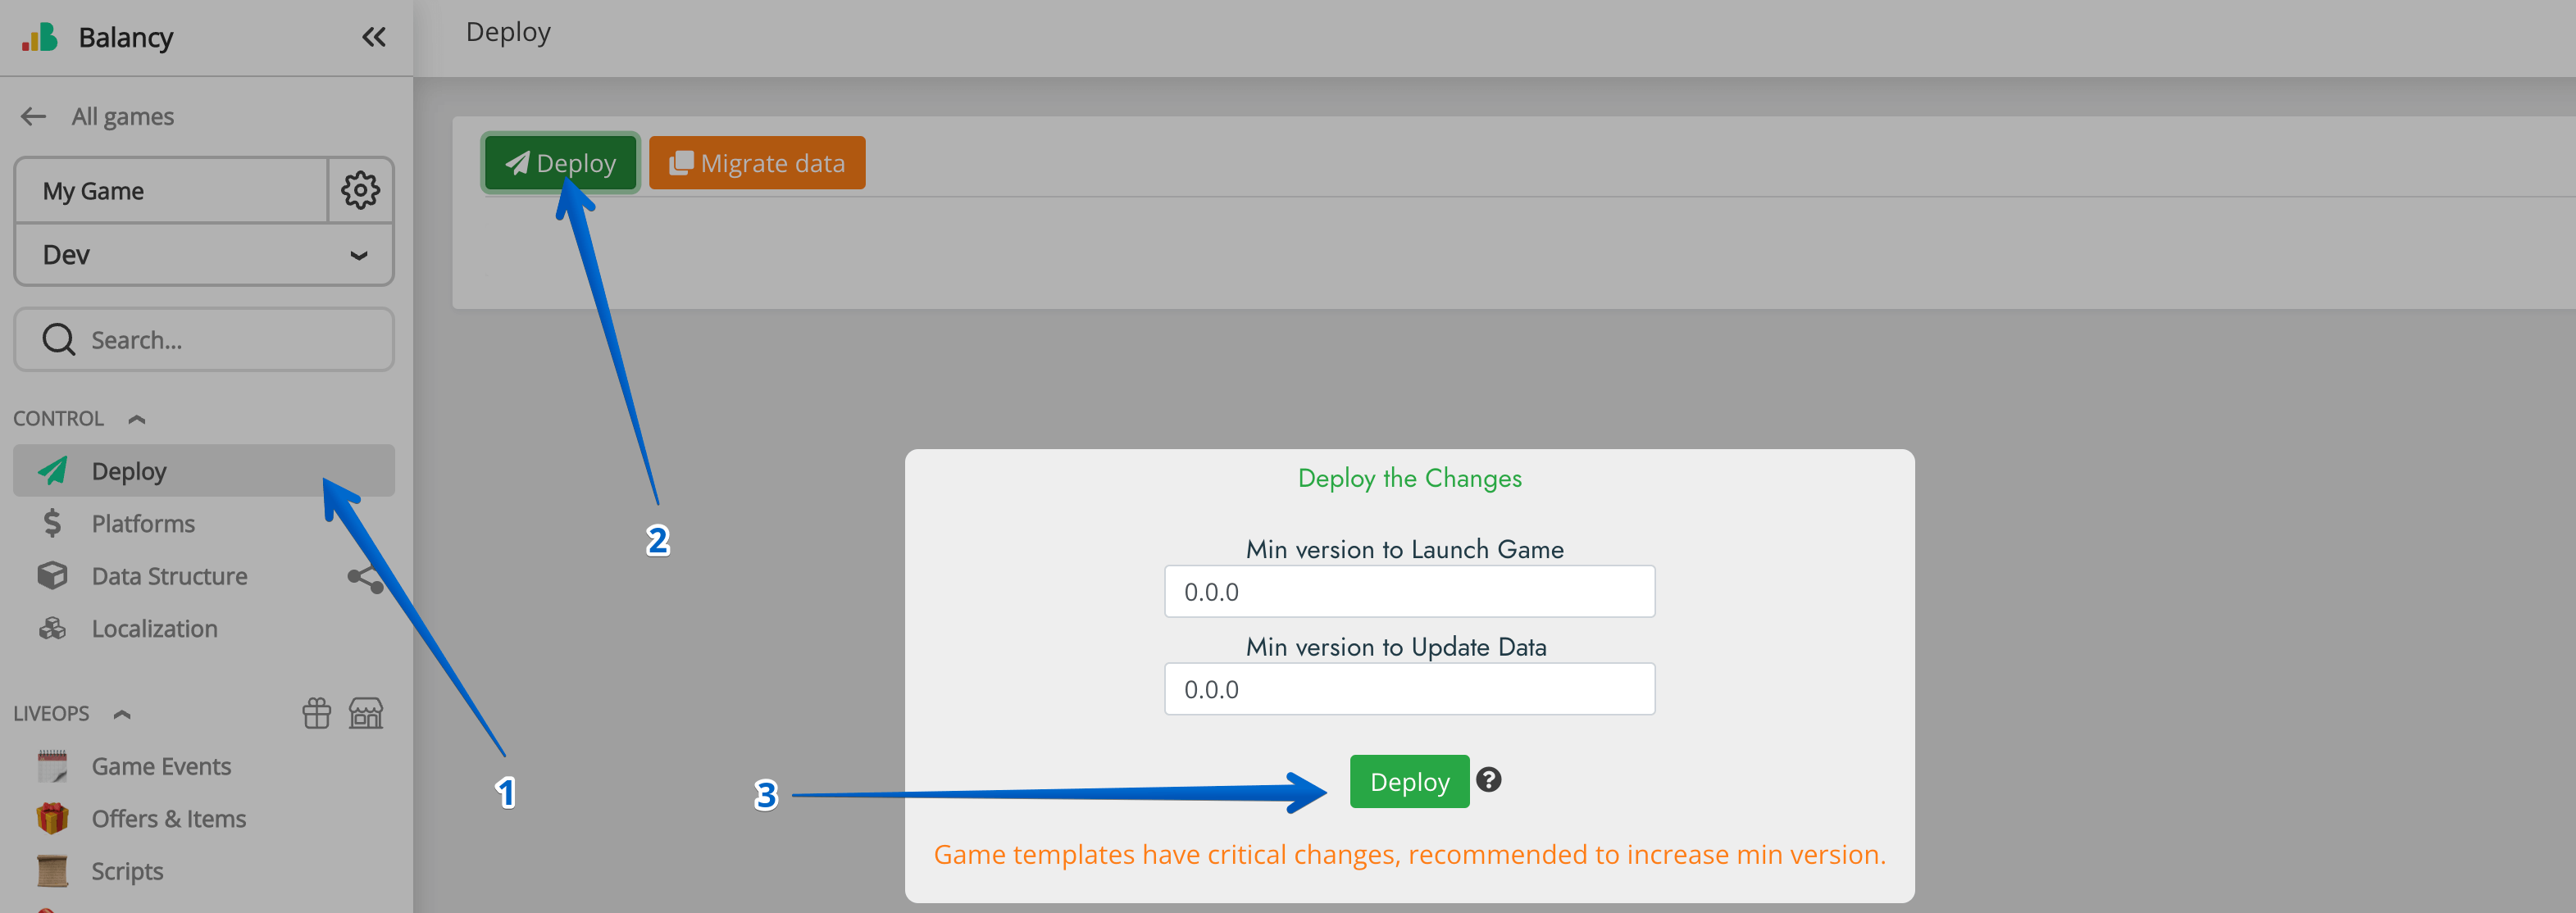
Deploy changes to environment.
Step 4. LiveOps Integration (Game) [30 minutes]
- Create a new class SmartObjectsEventsExample and inherit it from our interface Balancy.SmartObjects.ISmartObjectsEvents, define all the interface methods. Or you can use the class, which comes with the package. You can find more information here.
-
Make sure to write some text in the console for the following methods of the SmartObjectsEventsExample class:
public void OnNewEventActivated(EventInfo eventInfo) { Debug.Log("=> OnNewEventActivated: " + eventInfo?.GameEvent?.Name); } public void OnNewOfferActivated(OfferInfo offerInfo) { Debug.Log("=> OnNewOfferActivated: " + offerInfo?.GameOffer?.Name + " ; Price = " + offerInfo?.PriceUSD + " ; Discount = " + offerInfo?.Discount); } -
Press Play in the Unity Editor.
- You should see the following logs in the console:
- "Balancy Initialized:..."
- "=> OnNewEventActivated:..."
- "=> OnNewOfferActivated:..." in 5 seconds
Congratulations! You have successfully completed LiveOps integration. Now you can experiment with the platform and continue reading the documentation to learn more about its capabilities.