In-Game Store
The In-Game Store is the place to generate money for your game. A good store usually has a variety of items players need during the game. For the convenience of navigation, developers usually split all the content into different pages, such as Gems, Gold, Limited Offers, Super Packs, Event Items, etc. Each page contains several slots with different prices.
Follow the instructions to add a Store to your game:
- Add the LiveOps package to your game.
- Open In-Game Store section from the navigation panel.
- + Create New Game Store with as many pages and slots as you need.
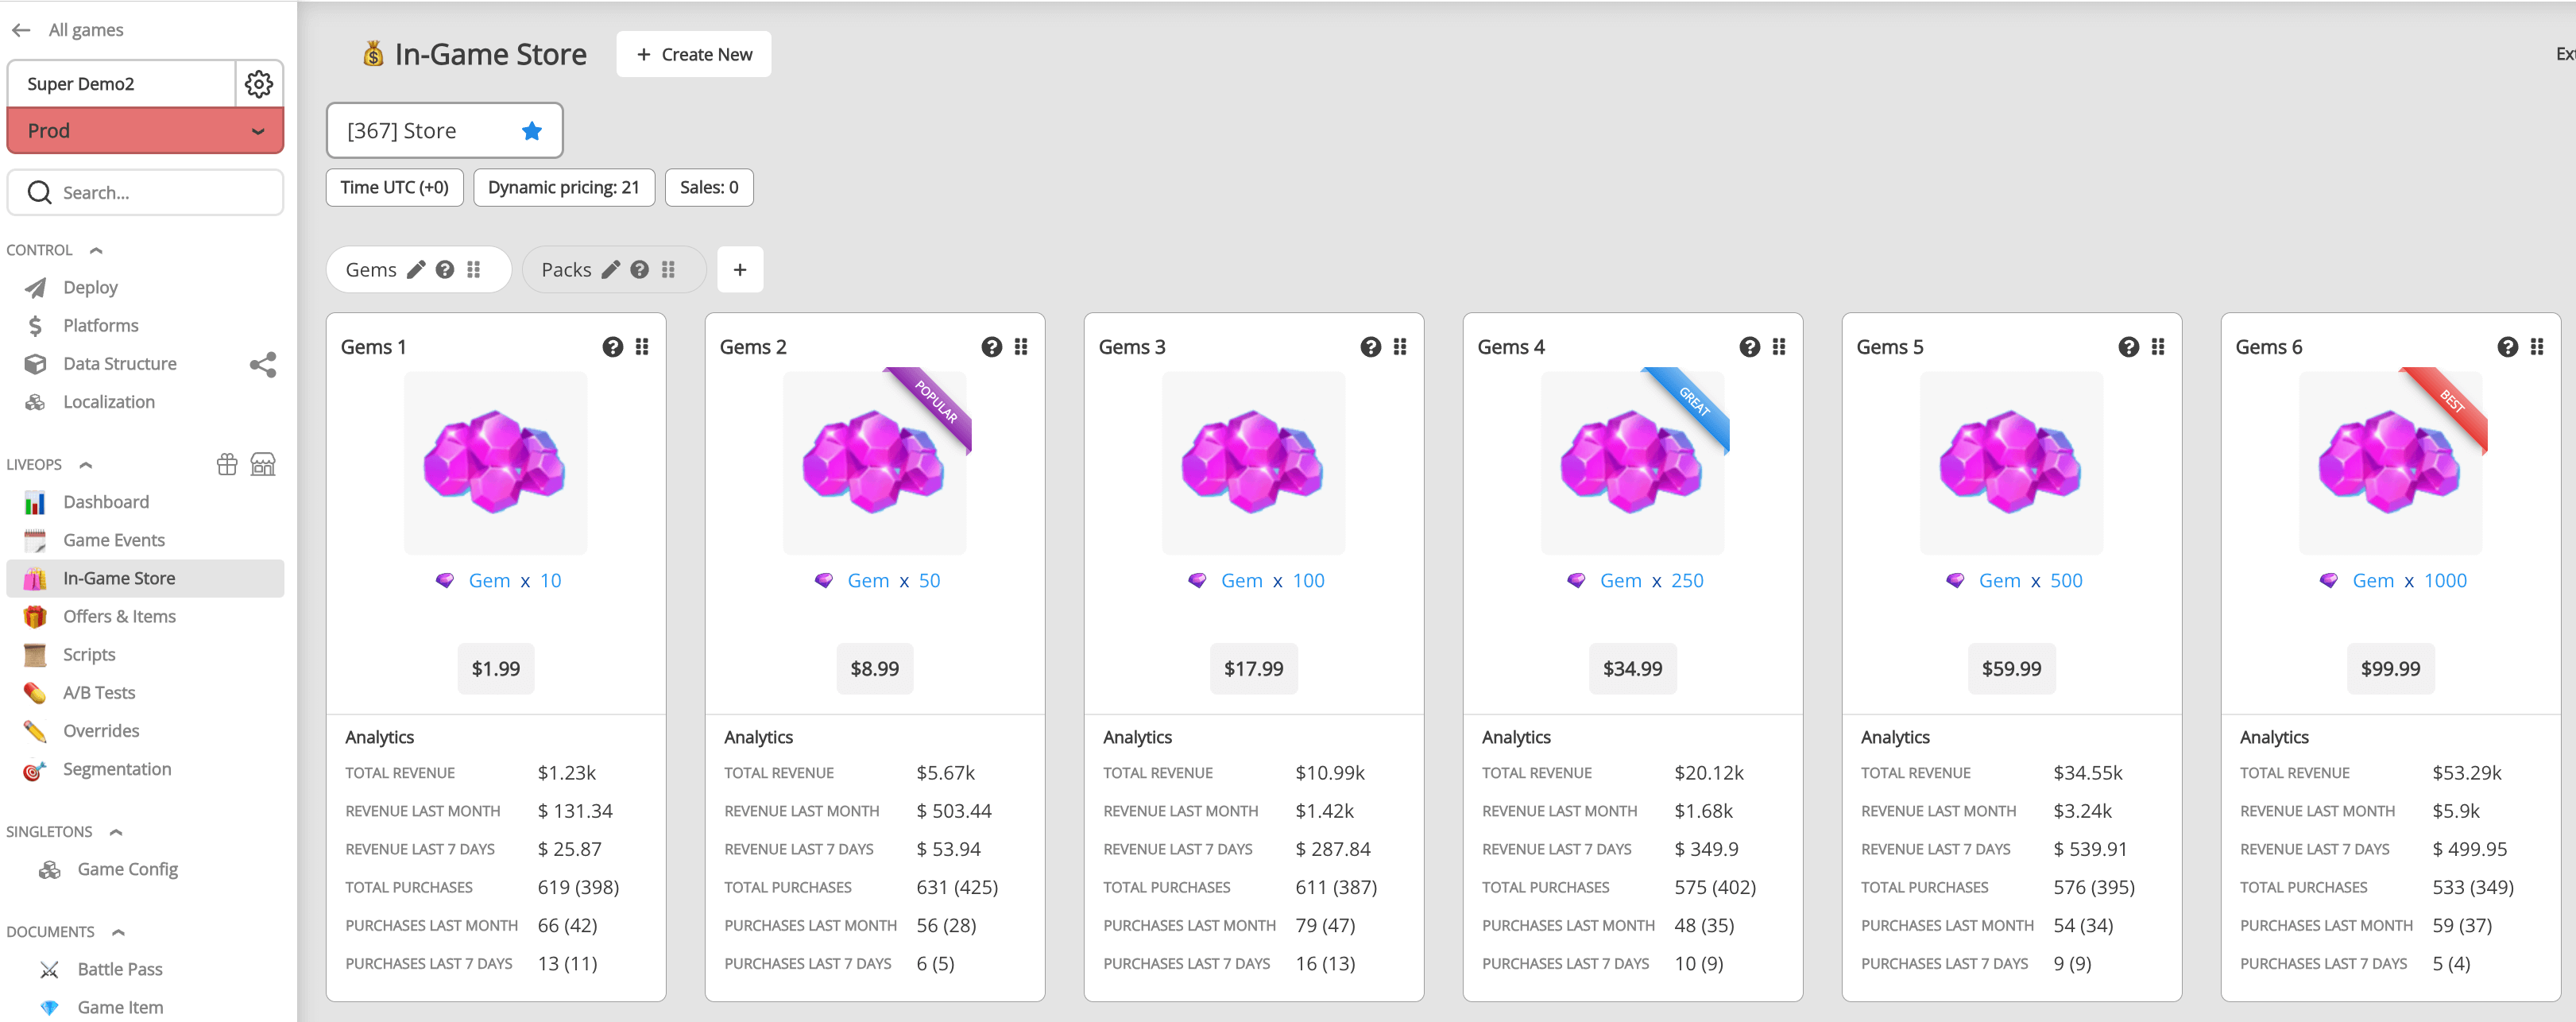
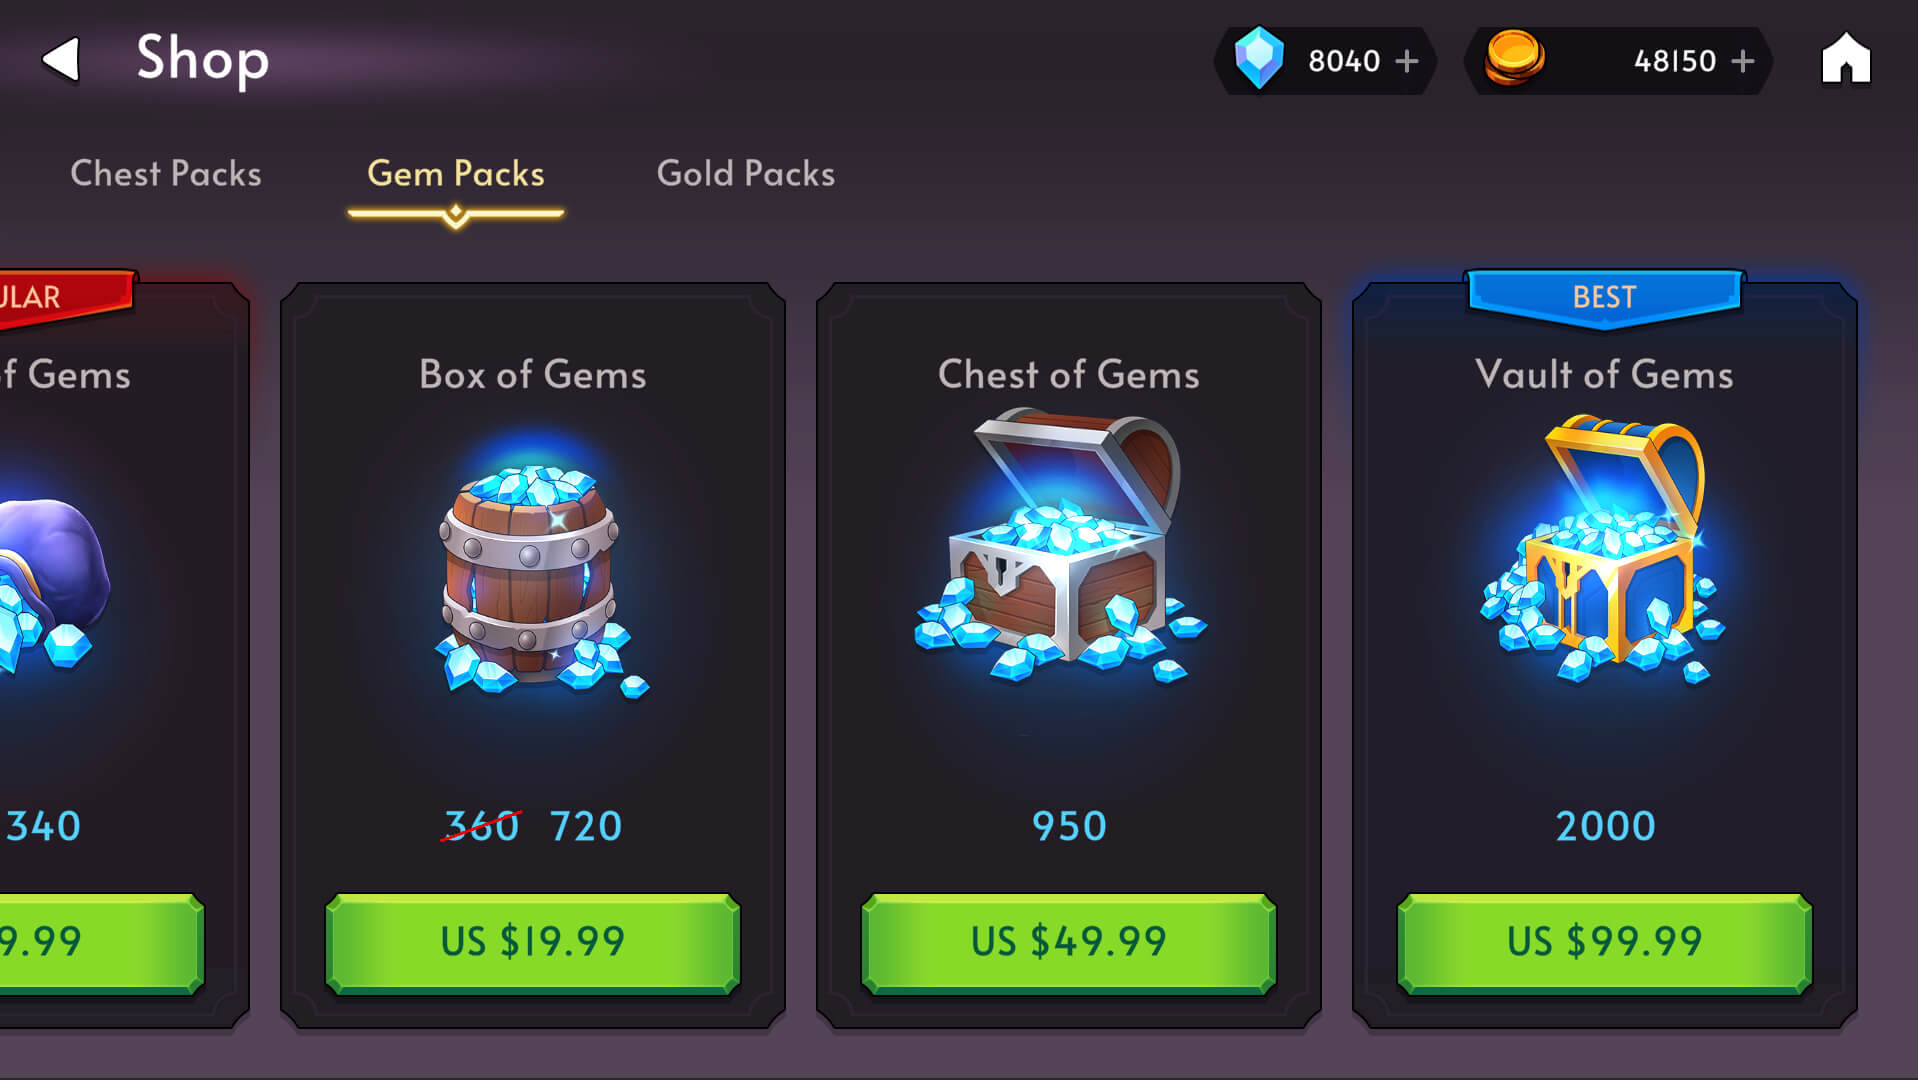
You can preview your work using our Demo project. It should look like this:
Slot Logic
Balancy has the following built-in slot behaviour types:
| Parameter | Description |
|---|---|
| Default | Such a slot can be purchased as it is any number of times. |
| First Purchase Bonus | Such a slot gives a bonus when purchased for the first time. |
| Periodic | Such slots can be purchased limited number of times during the specified period. For example, a maximum of 2 times a day. |
| Cooldown | Once the slot is purchased, it'll be set on the cooldown. While on cooldown, you can't purchase it again. |
These behaviours can be combined, for example:
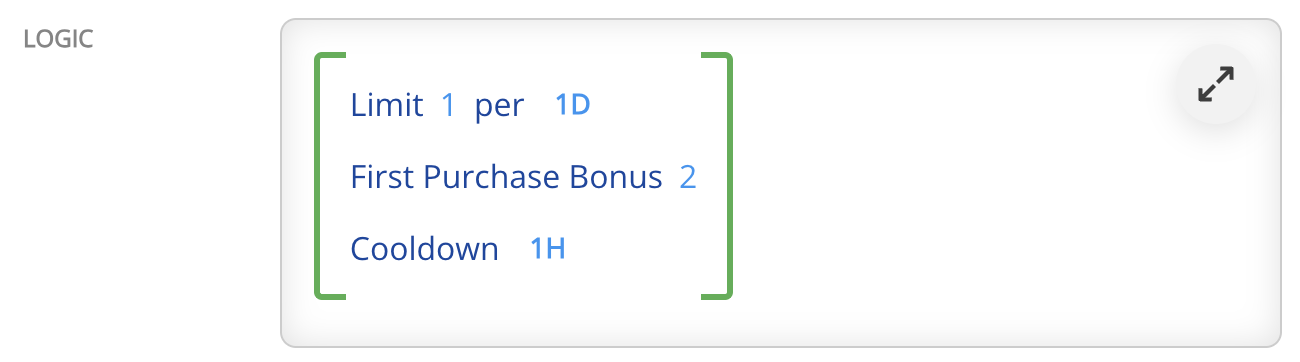
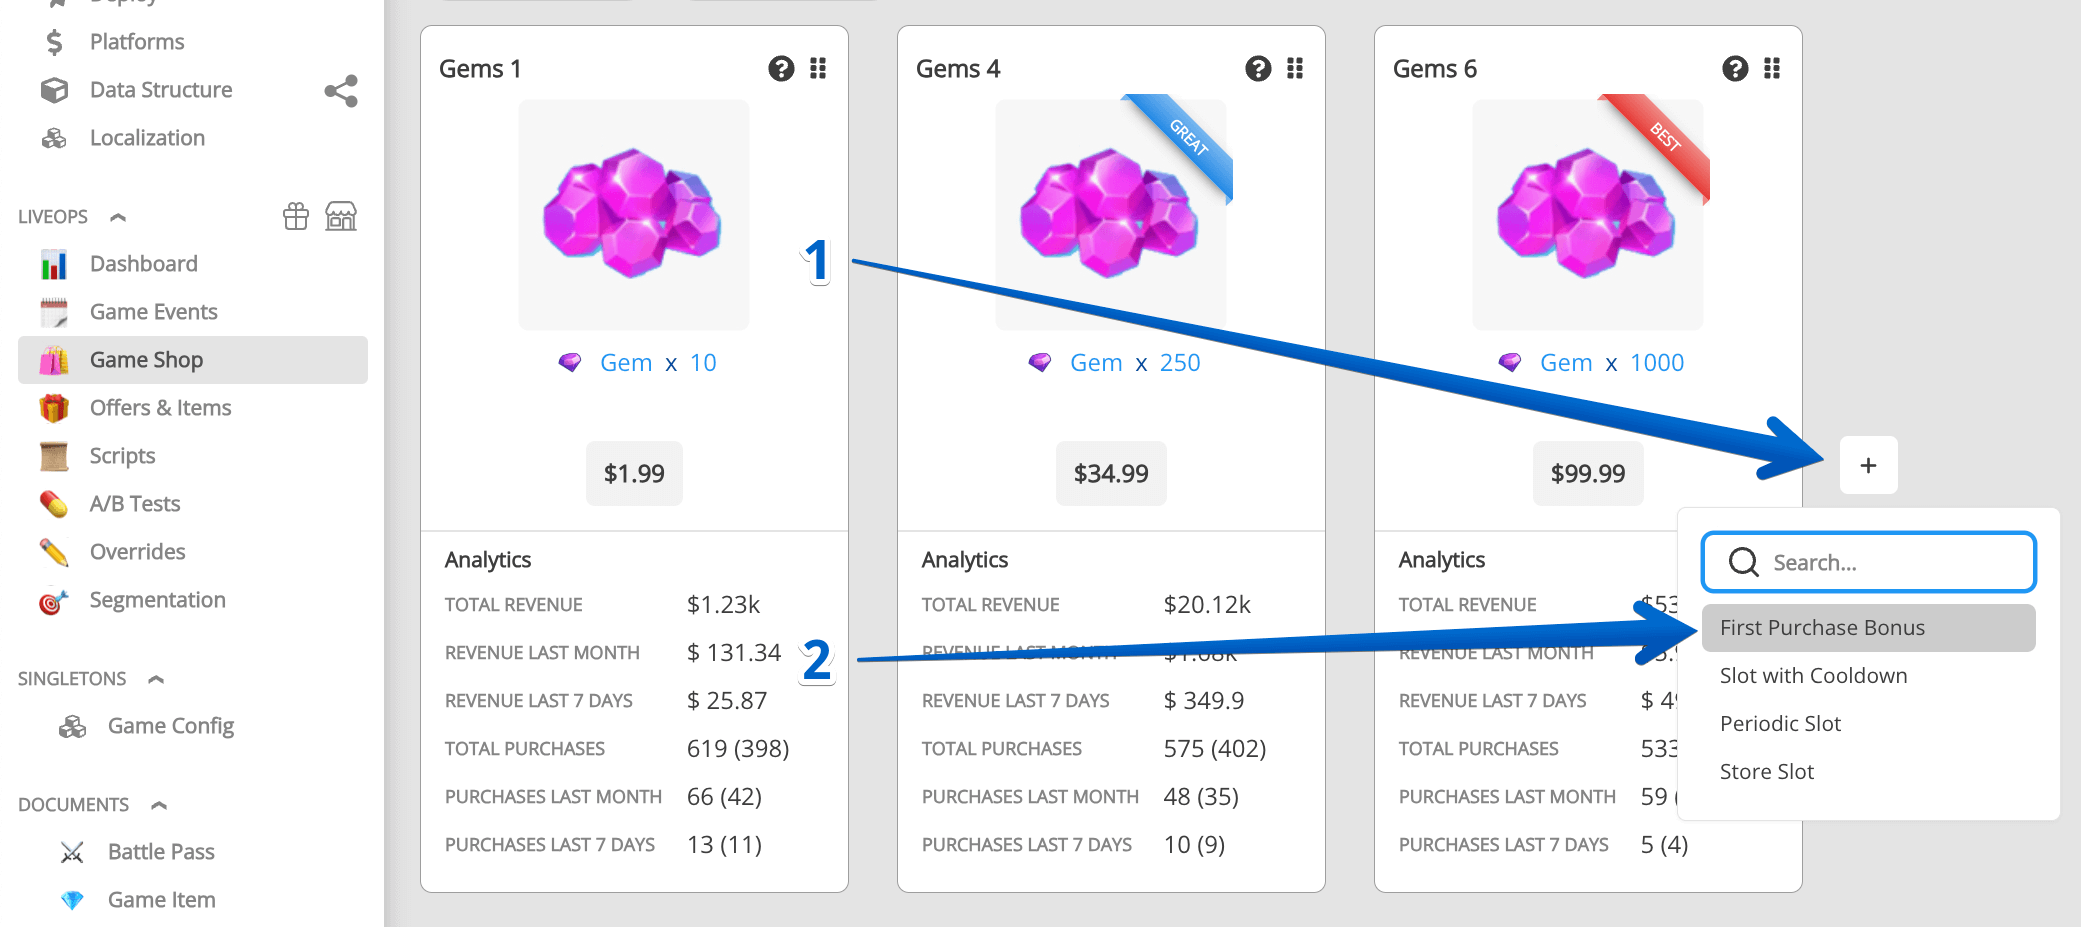
First Purchase Bonus
One of the most effective conversion methods is the first purchase bonus. Players get double rewards for the same price. Players can usually double each Store Slot, which pushes them to purchase every slot, growing your ARPU and LTV. Such an offer has no time limitation. Thus, players are always tempted to make the first purchase with a bonus.
As you can see, only several minutes separate you from a compelling monetization method. Take a look at what this feature looks like in Mobile Legends game.

Free Items
Daily Gifts and Bonuses are a great way to make players visit your game and the store daily. While collecting rewards, they'll create a habit of constantly checking the store, and the chances to find and purchase something valuable grows.
Custom Store Slots
If your game has needs which not covered by Balancy by default, you can always create your own logic.
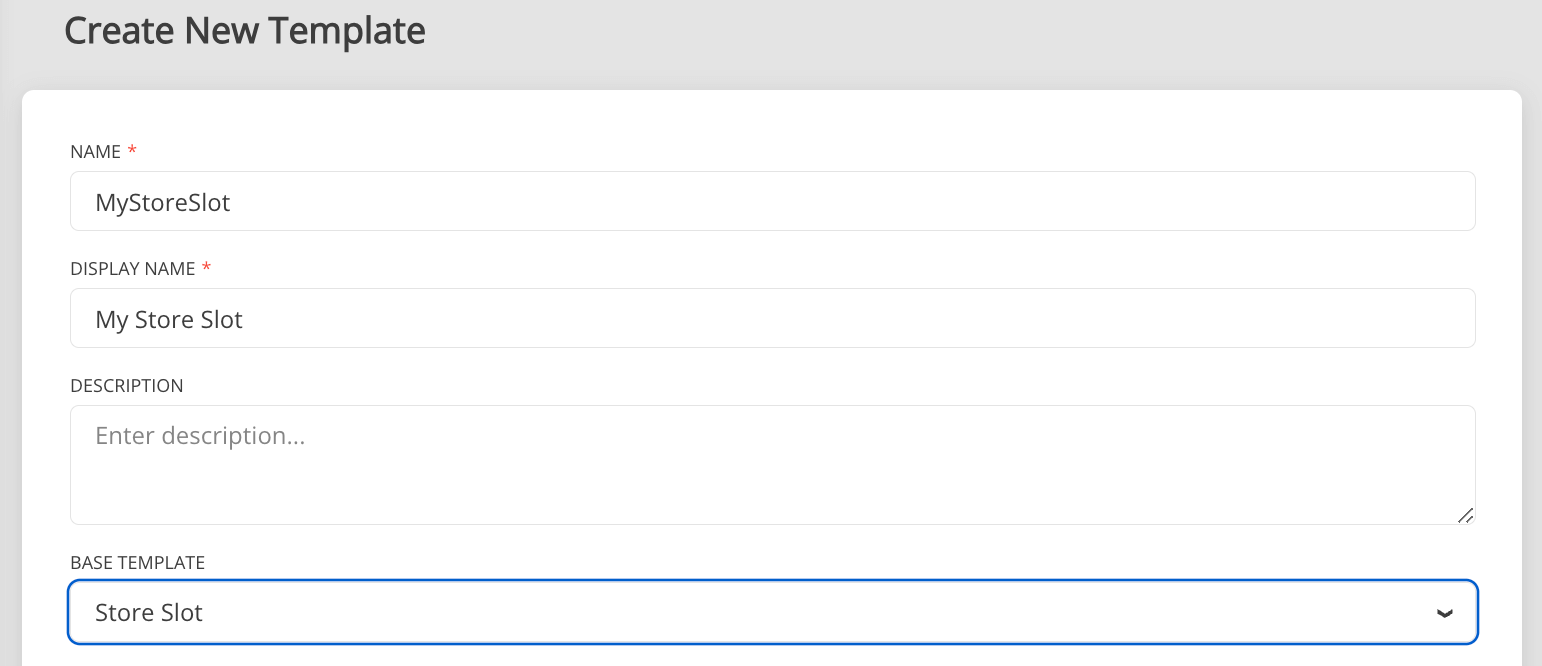
- Create MyStoreSlot template inherited from Store Slot.
- Define any new parameters you need.
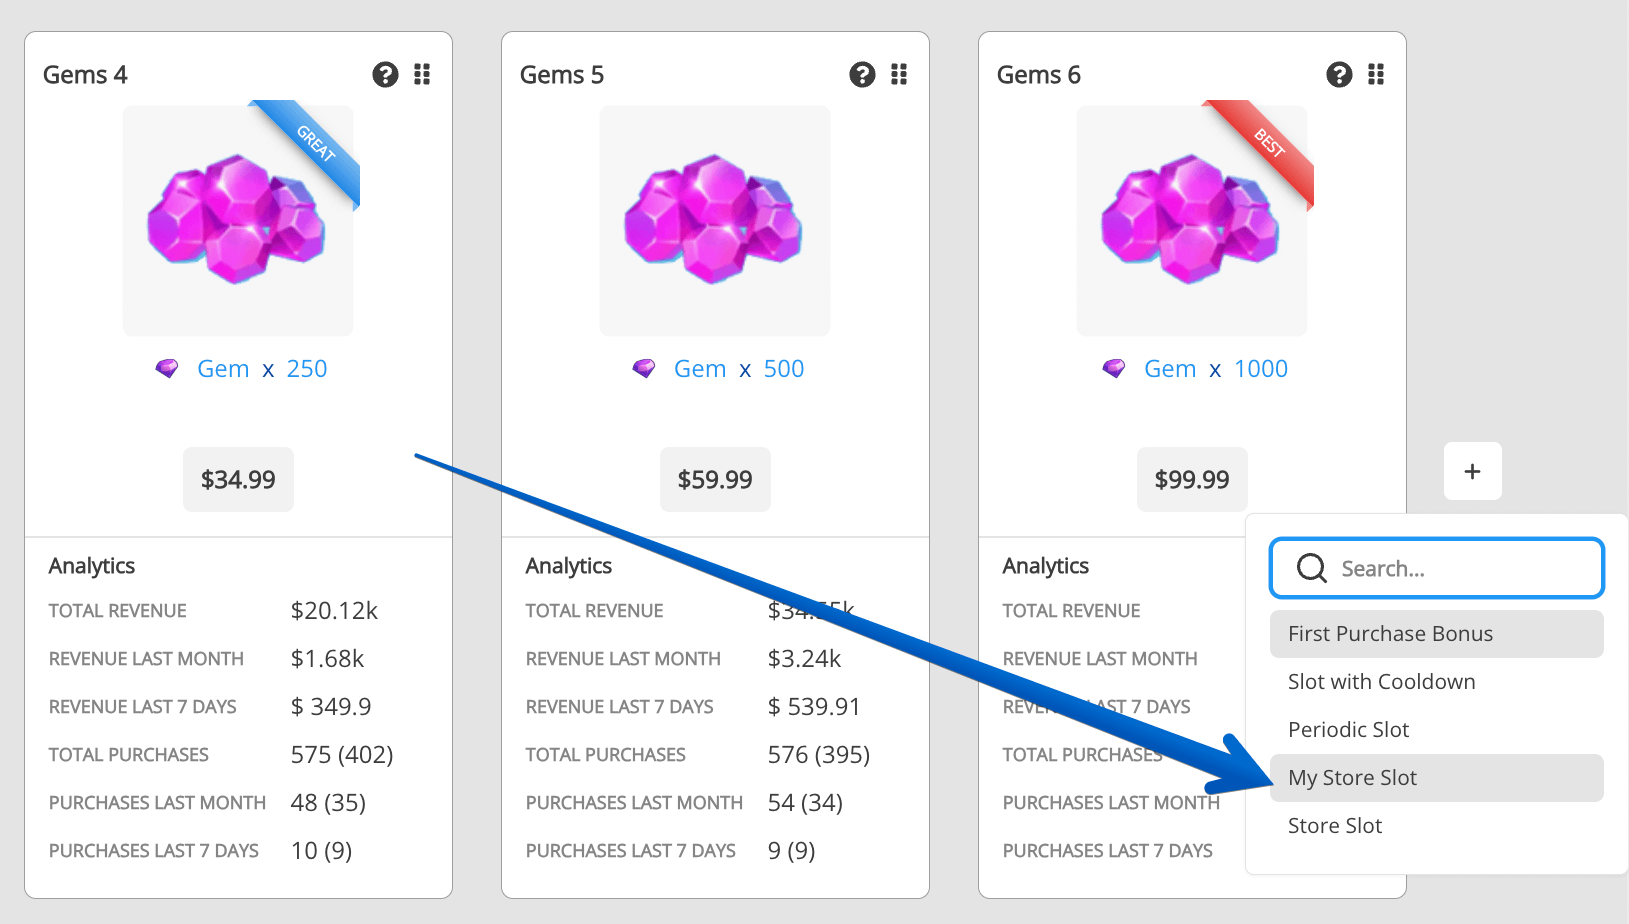
- Start using the MyStoreSlot template.
- Mark the template with Partial flag and ask your engineers to write additional Logic if necessary.
After the code is generated, add a new class inside of the Balancy folder (due to the amsdef file) but outside of the AutoGeneratedCode folder (to avoid data loss after the following code generation). For example, you can make a new folder Assets/Balancy/Custom and put all your custom scripts there.
using Balancy.Models.SmartObjects;

namespace Balancy.Models
{
    public partial class MyStoreSlot : LiveOps.Store.Slot
    {
        public override bool IsAvailable()
        {
            return base.IsAvailable();
        }

        public override StoreItem GetStoreItem()
        {
            return base.GetStoreItem();
        }

        public override int GetSecondsLeftUntilAvailable()
        {
            return base.GetSecondsLeftUntilAvailable();
        }
    }
}
Sales
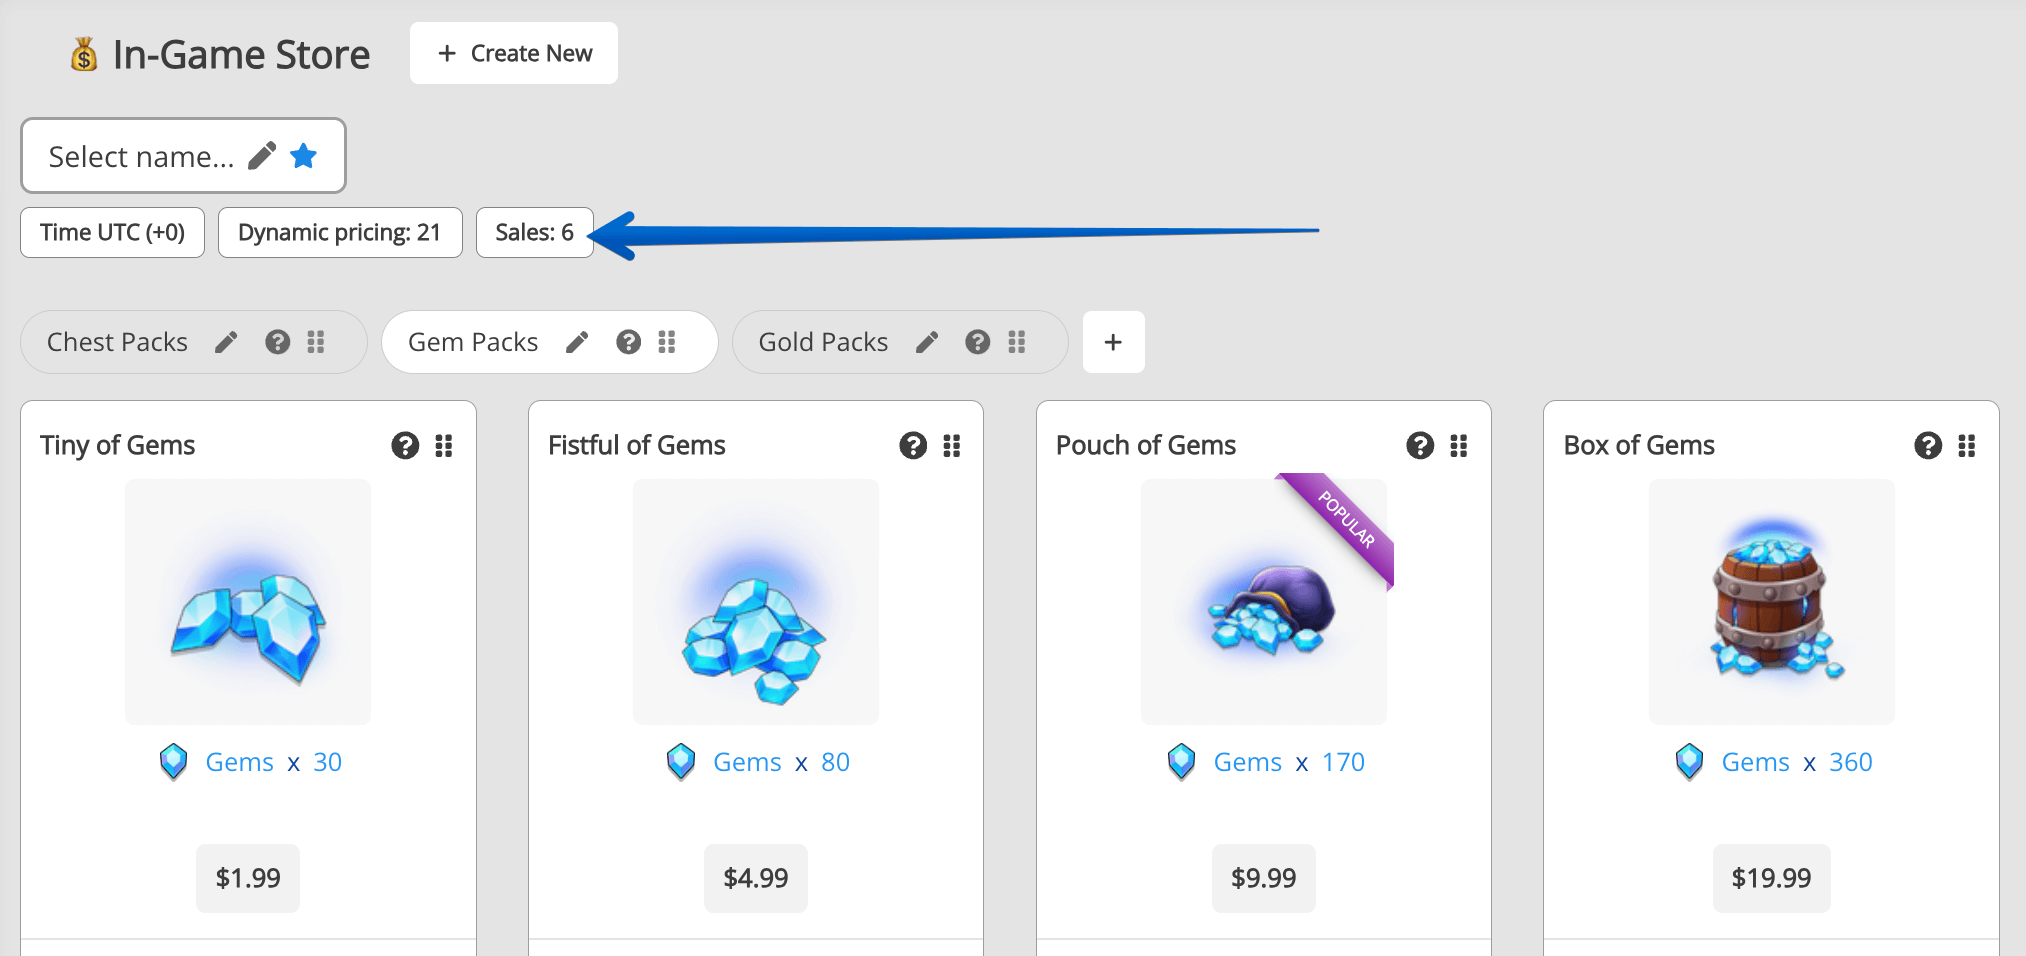
With Balancy's integrated feature, you can effortlessly run sales, offering additional resources at unchanged prices. In this guide, we'll walk you through the process of initiating a weekend sale, where players can buy gems at three times of their usual quantity.
-
Selecting Sale Items: Begin by identifying the items you want to include in the sale.
- Navigate to the Game Store section.
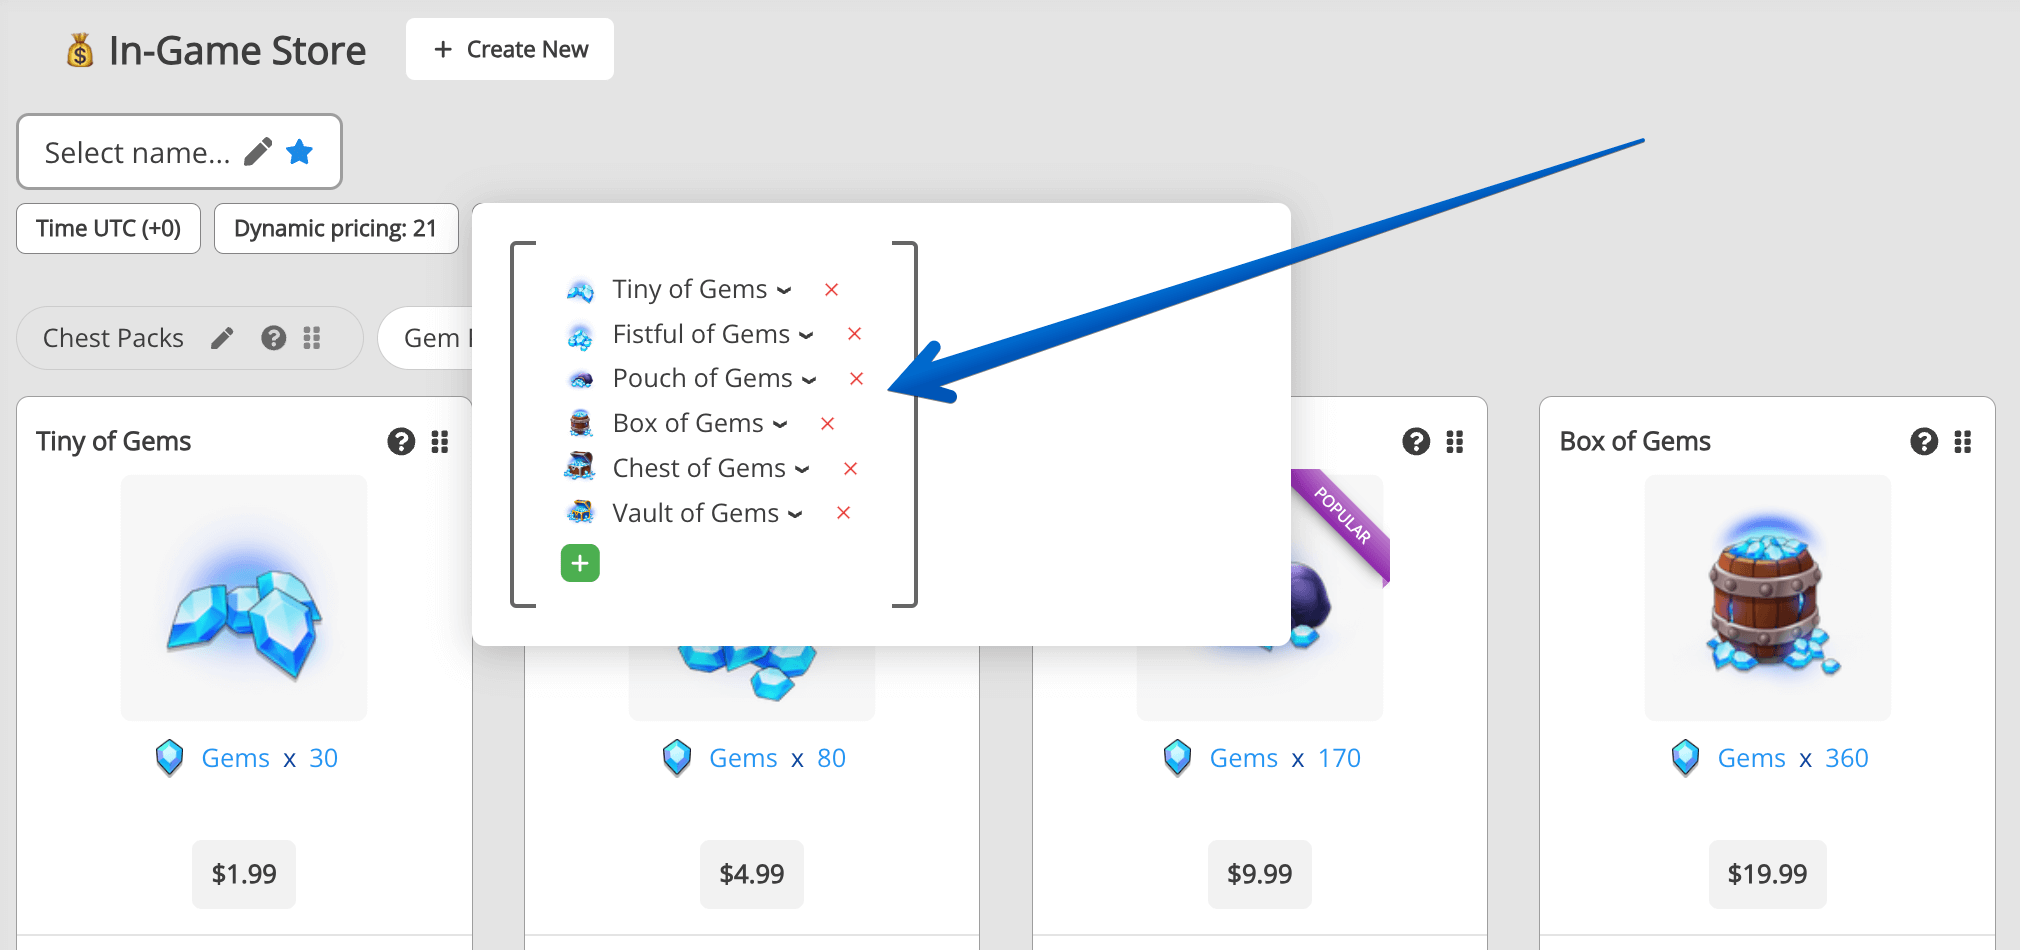
- Click the Sales button.
- Add the desired Store Items to the sale.
-
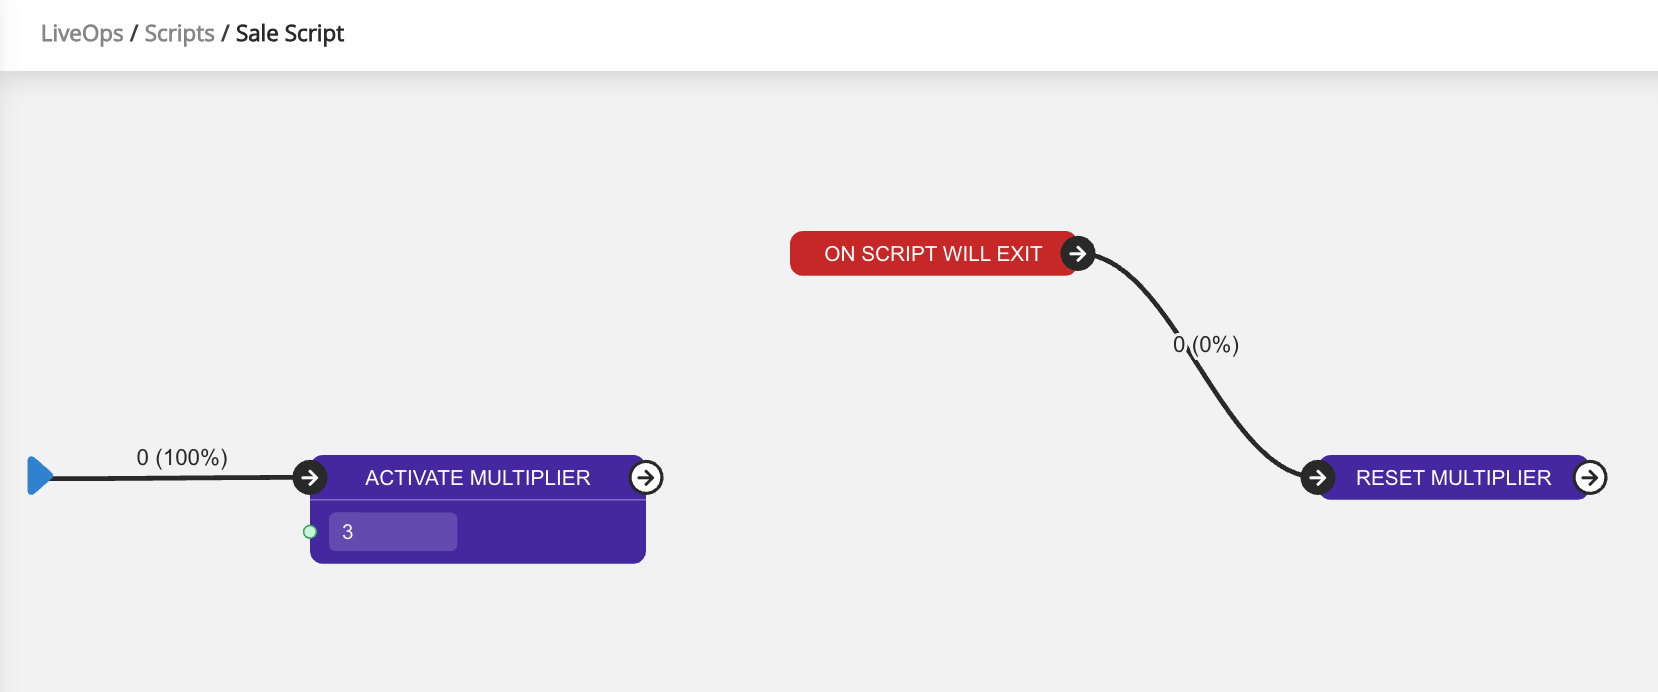
Creating the Multiplier Script: Develop a basic Script to Activate Multiplier. Ensure you set its value to 3. Before concluding the script, make sure to reset the multiplier to its original value.
-
Initiating the Sales Game Event: To activate the sale:
- Set up a Game Event.
- Specify the event's conditions based on specific days of the week.
- Attach the previously created script to this event.

-
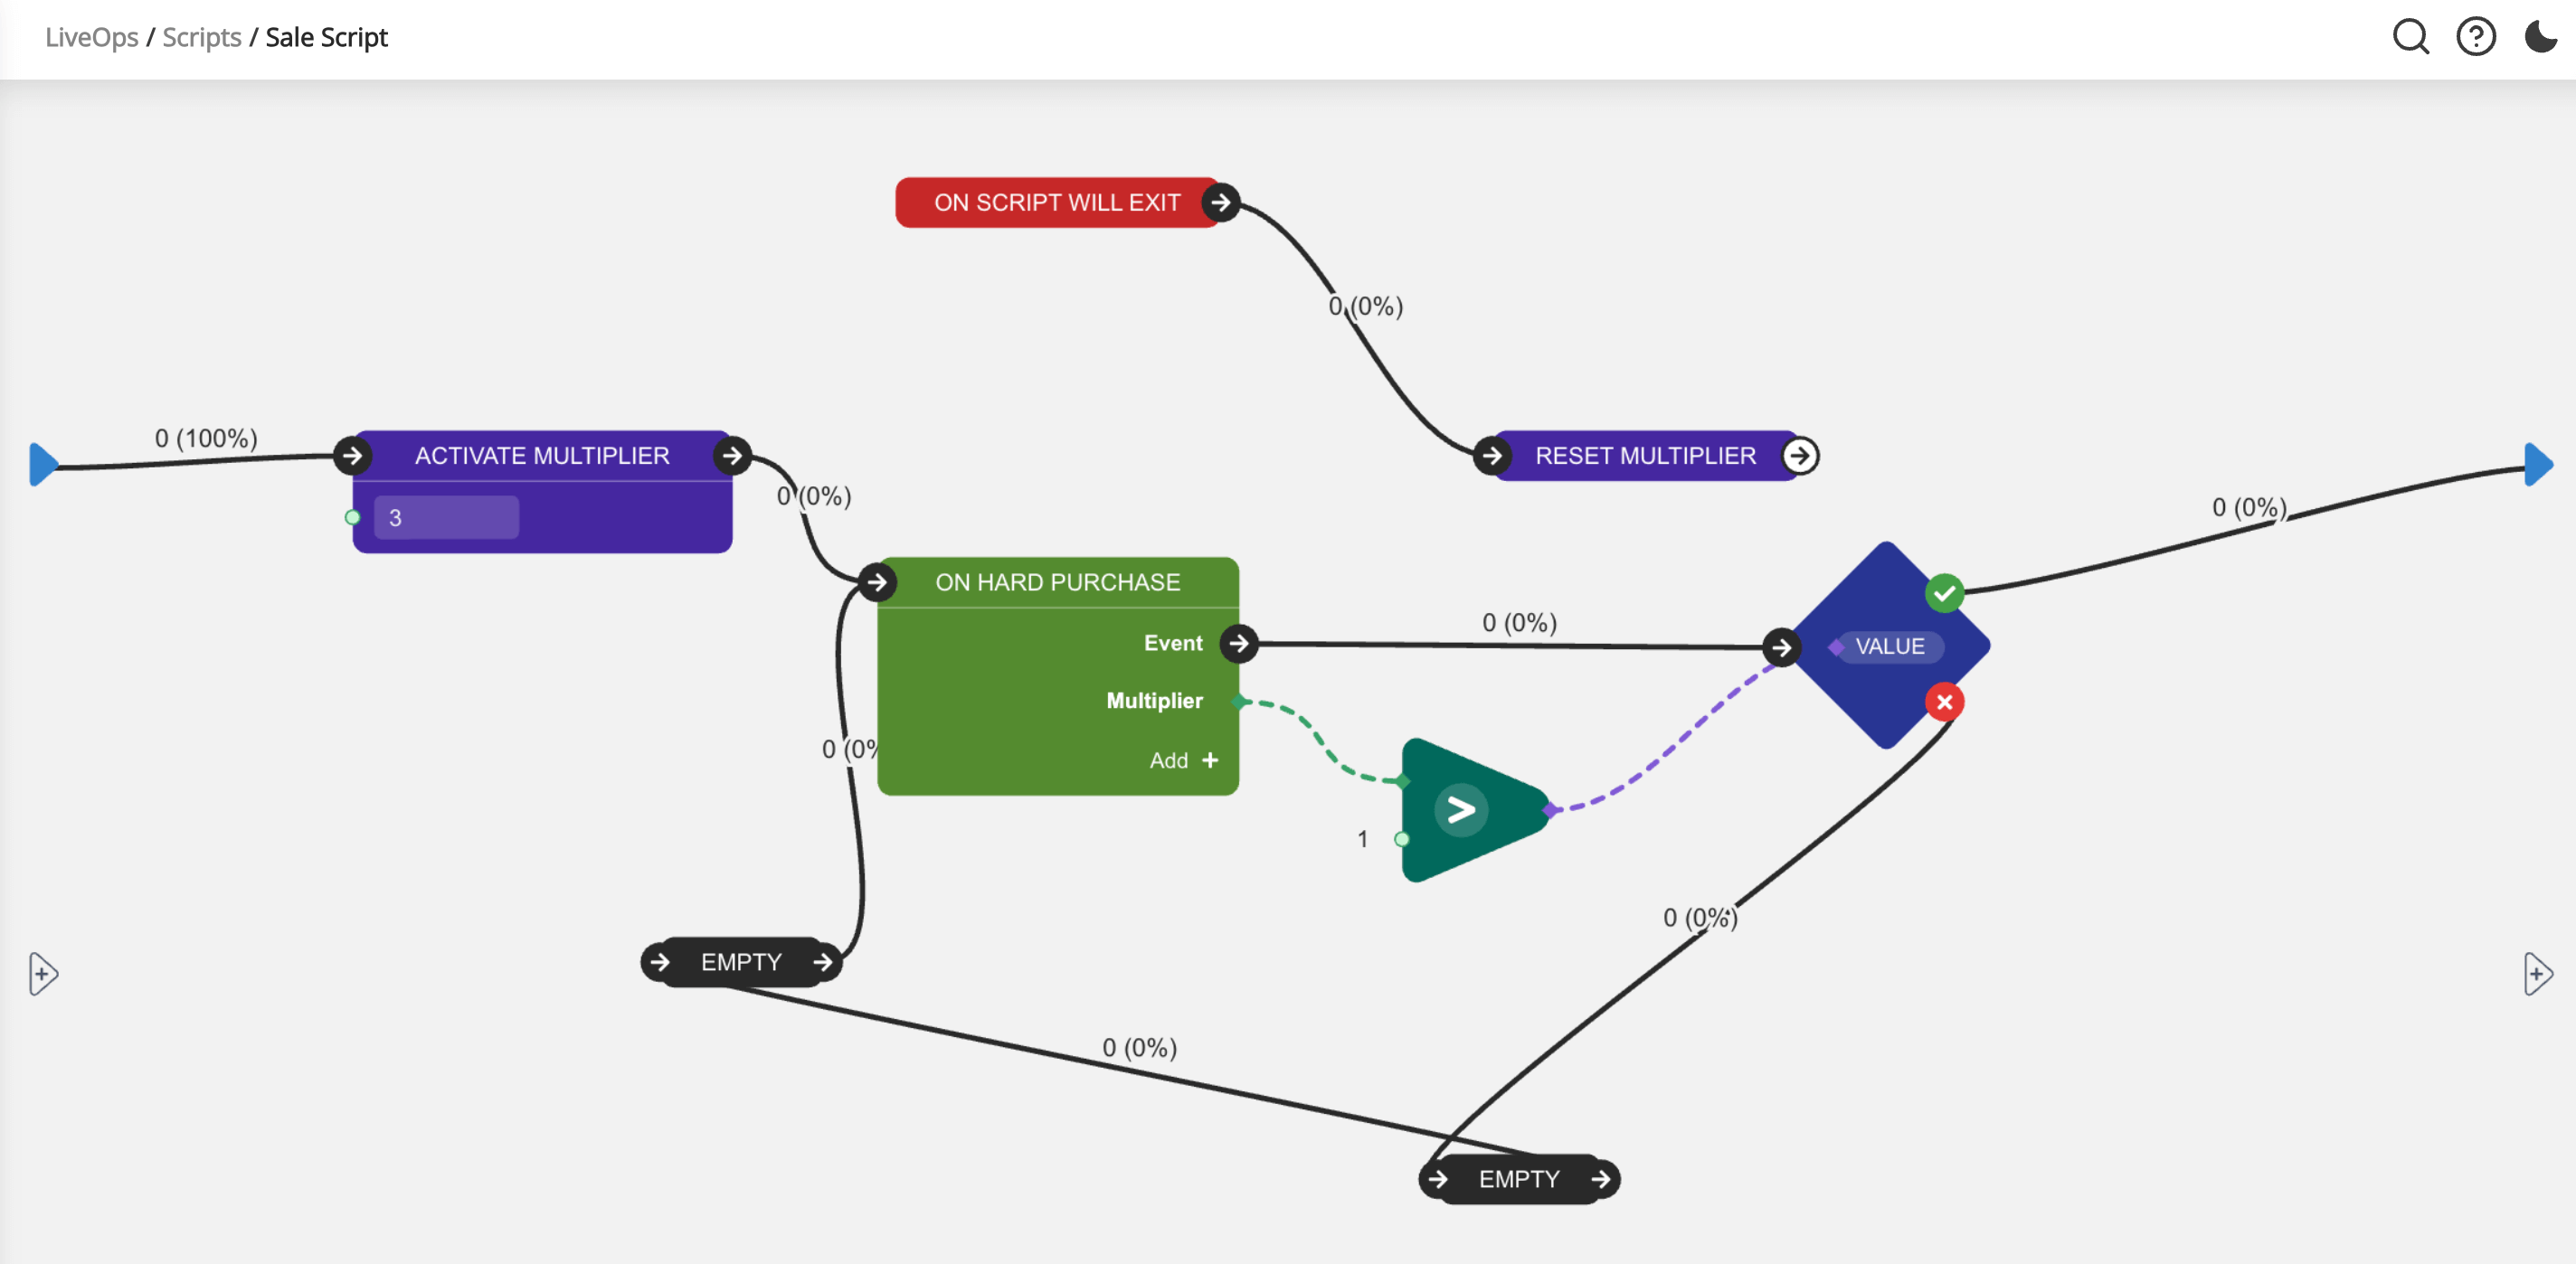
Limiting Purchase Quantity (Optional): If you aim to restrict players to a single purchase during the sale:
- Adjust your script to exit immediately after the initial purchase using the multiplier.
- This action ensures the sale ends post-purchase, without waiting for the Game Event to conclude.
Section for programmers
-
Use the following code to access the Store config and read all active Store Pages and Slots.
var smartConfig = Balancy.LiveOps.Store.DefaultStore; var pages = smartConfig.ActivePages; foreach (var page in pages) { foreach (var activeSlot in page.ActiveSlots) { //TODO write your code here } } -
Visit the Payments section to read how to purchase Store Items and check availability.
-
The store can be updated at runtime due to Conditions being actively used in Store Pages and Slots. You should subscribe to such events and handle them:
smartConfig.OnStoreUpdatedEvent page.OnStorePageUpdatedEvent -
Another way to track the changes in the Store is to register LiveOps Listener:
ExternalEvents.RegisterLiveOpsListener(new LiveOpsStoreEventsExample());
Visit the Programmers Section and learn how to subscribe for important events.
Example:
- Find the Prefab called ExampleStore and place it in the Scene.
-
After the game starts and Balancy is initialized, call the following method(winStore is the link to the WinStore script on the ExampleStore gameObject):
winStore.Init(Balancy.LiveOps.Store.DefaultStore); -
Enjoy the demo. And remember - you can use the source code we provided as you wish.
Custom Store
Sometimes you need to have several Stores with additional parameters. It might be required for very complex games with a lot of content and different places to sell goods. Follow the next steps to create multiple stores:
- Create and inherit a new Template from 💰Game Store Base. Let's call it MyStore for example.
- Add new parameters. I'll add Name - LocalizedString and Condition - Logic.
- Add several documents to the table, and you'll get something like this:
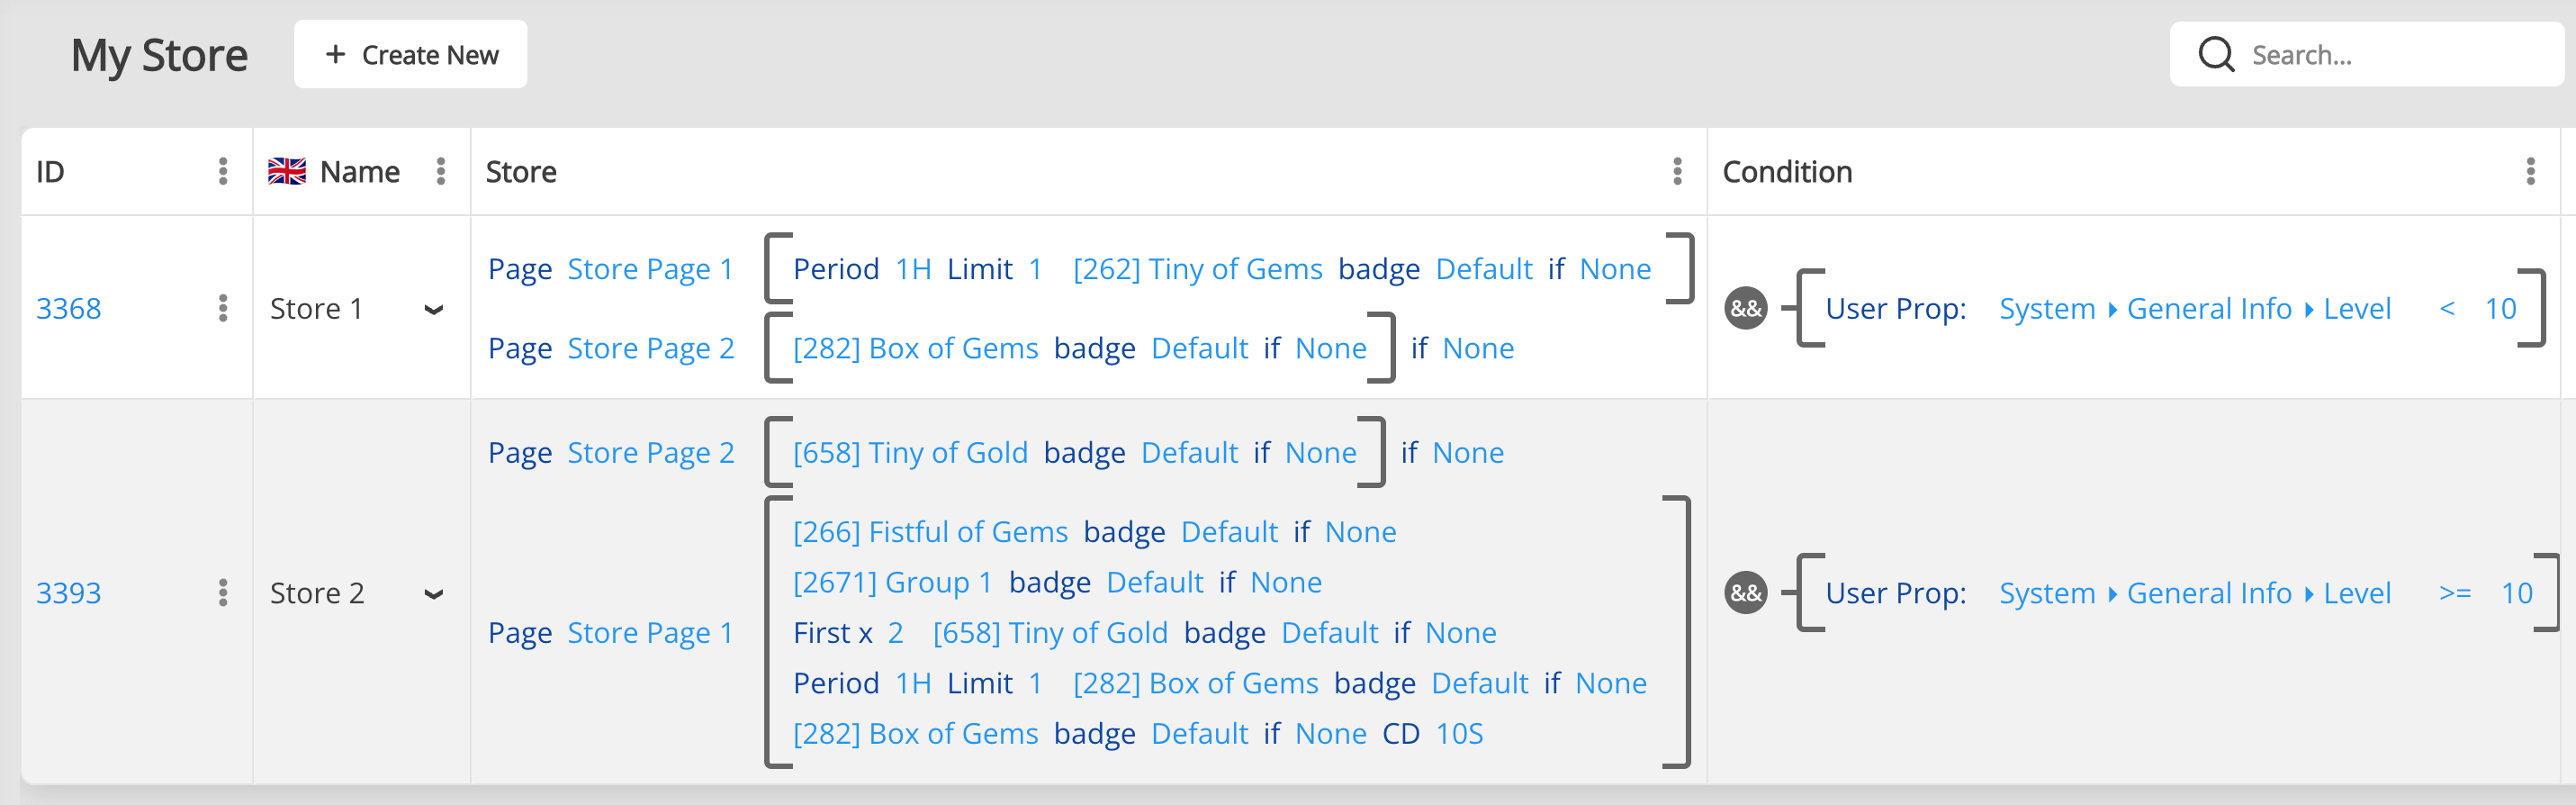
Let's use the Condition to show different stores for players, depending on their level. Next, you need to ask your engineer to add logic to make it work for your case.
-
First, you need to init the store document:
var myStore = LiveOps.Store.InitCustomStore(store) as MyStore; -
When you are done working with the store, don't forget to clean it up:
myStore.Clear();
Read here how to work with Conditions.
Below is the complete example:
using System;
using System.Collections.Generic;
using Balancy;
using Balancy.Models;
using Balancy.Models.SmartObjects.Conditions;
using Balancy.SmartObjects;

public class MyStoreManager : IConditionsListener
{
    public static event Action<MyStore> OnStoreChanged;

    private static MyStoreManager _instance;

    private readonly List<MyStore> _activeStores = new List<MyStore>();

    public static void Init()
    {
        if (_instance == null)
        {
            _instance = new MyStoreManager();
            _instance.SubscribeForStores();
        }
    }

    public static void Clear()
    {
        _instance?.UnsubscribeFromStores();
        _instance = null;
    }

    private void SubscribeForStores()
    {
        var allStores = DataEditor.MyStores;
        foreach (var store in allStores)
        {
            var myStore = LiveOps.Store.InitCustomStore(store) as MyStore;
            _activeStores.Add(myStore);
            LiveOps.General.ConditionSubscribe(myStore.Condition, myStore, this, PassType.False);
        }
    }

    private void UnsubscribeFromStores()
    {
        foreach (var store in _activeStores)
        {
            LiveOps.General.ConditionUnsubscribe(store, this);
            store.Clear();
        }

        _activeStores.Clear();
    }

    public void ConditionPassed(object data)
    {
        Refresh();
    }

    public void ConditionFailed(object data)
    {
        Refresh();
    }

    private void Refresh()
    {
        var firstStore = FindTheFirstStore();
        OnStoreChanged?.Invoke(firstStore);
    }

    private MyStore FindTheFirstStore()
    {
        foreach (var store in _activeStores)
        {
            if (LiveOps.General.CanPassCondition(store.Condition) == PassType.True)
                return store;
        }

        return null;
    }
}
All you need to start working with the following class is to Subscribe for the Store change and call Init method:
MyStoreManager.OnStoreChanged += OnStoreChanged;
MyStoreManager.Init();
In this example, there is only one flaw: when a player changes their level, both Stores invoke the Refresh method, so you'll be notified twice. It's not a big deal, but we'll leave it to you to fix it as a homework.