CMS Usage Example
In this example, I will show you how you can create a simple craft logic for your game. We will need just several Templates: Item, Recipe, and Ingredient. I assume you've read and implemented the basics for your game.
Here is the video of this tutorial.
Templates preparation
- Select Templates Section and click on Create Template
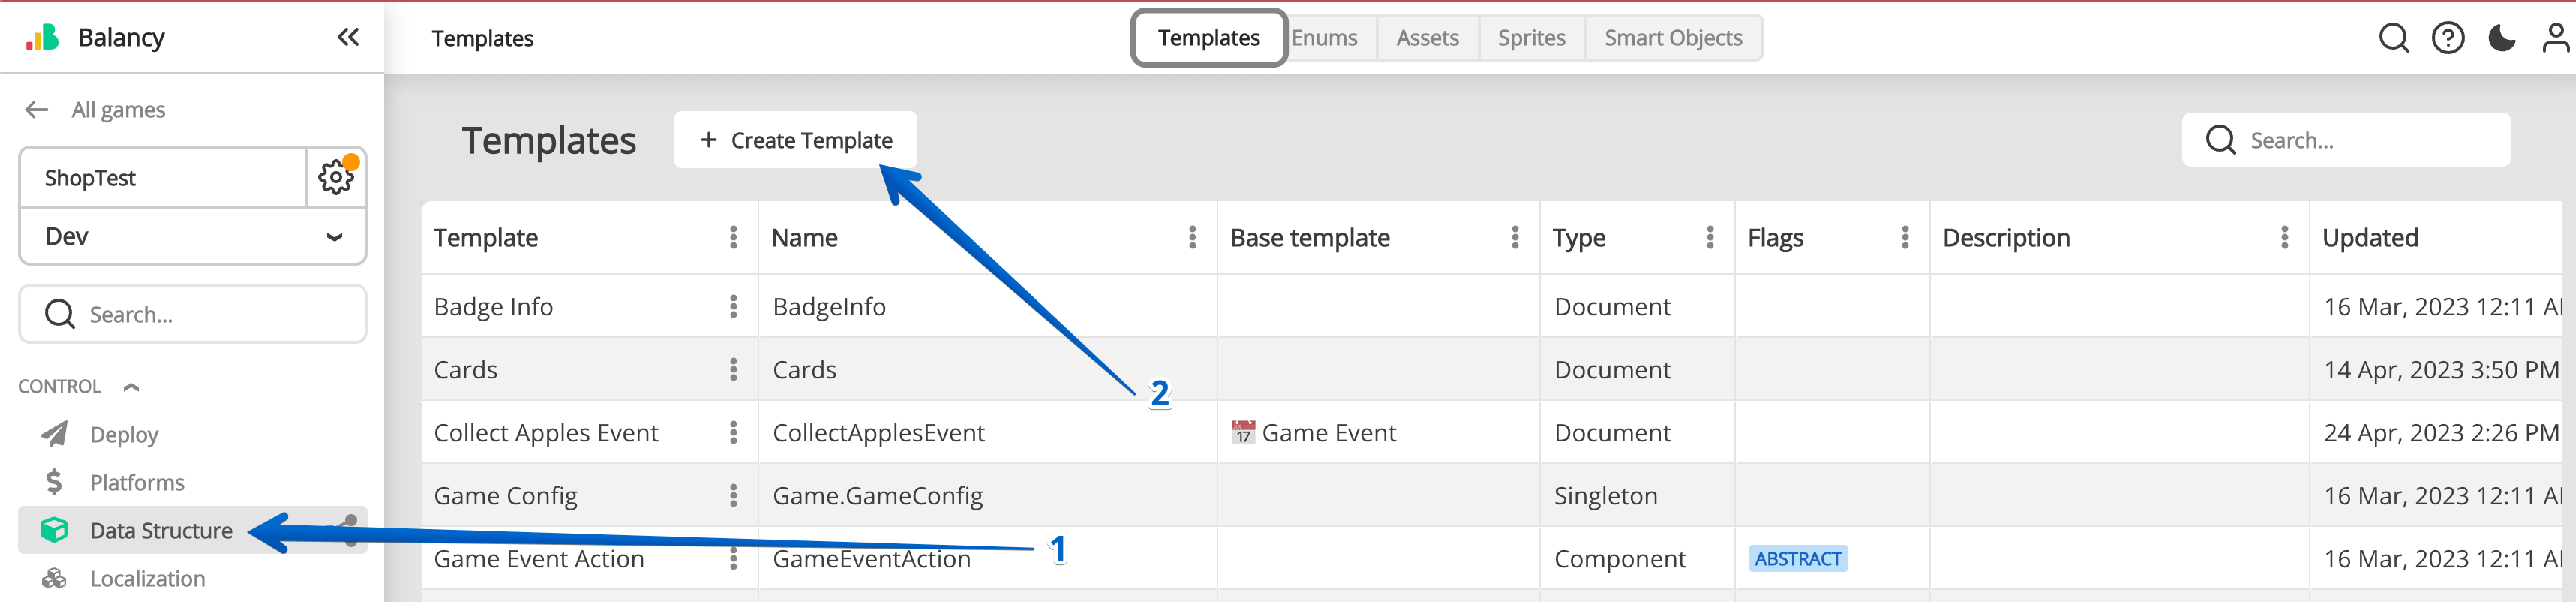
- Set Name as "Item" and leave other fields as default.
- Add the following parameters:
- Name: (Type: String, Use in display name - YES)
- Description: (Type: String)
- Create another Template for Ingredients. We'll make it a Component for convenience.
- Name: Ingredient
- Type: Component
- Add the following parameters:
- Item: (Type: Document, Reference Template: Item)
- Count: (Type: Integer, Default value: 1)
- The last template we going to need is a Recipe. Set Name as "Recipe" and leave other fields as default.
- Add the following parameters:
- Item: (Type: Document, Reference Template: Item)
- Ingredients: (Type: List, List Type: Document, Reference Template: Ingredient)
Create documents
Now as we have our Templates ready, we need to add a couple of actual items and recipes. When you add the Templates, you should've noticed that two new sections appear in the navigation (on the left): Items and Recipe. The ingredient doesn't appear because it's a Component and exists only within another Document.
- In the Navigation Panel, select Items
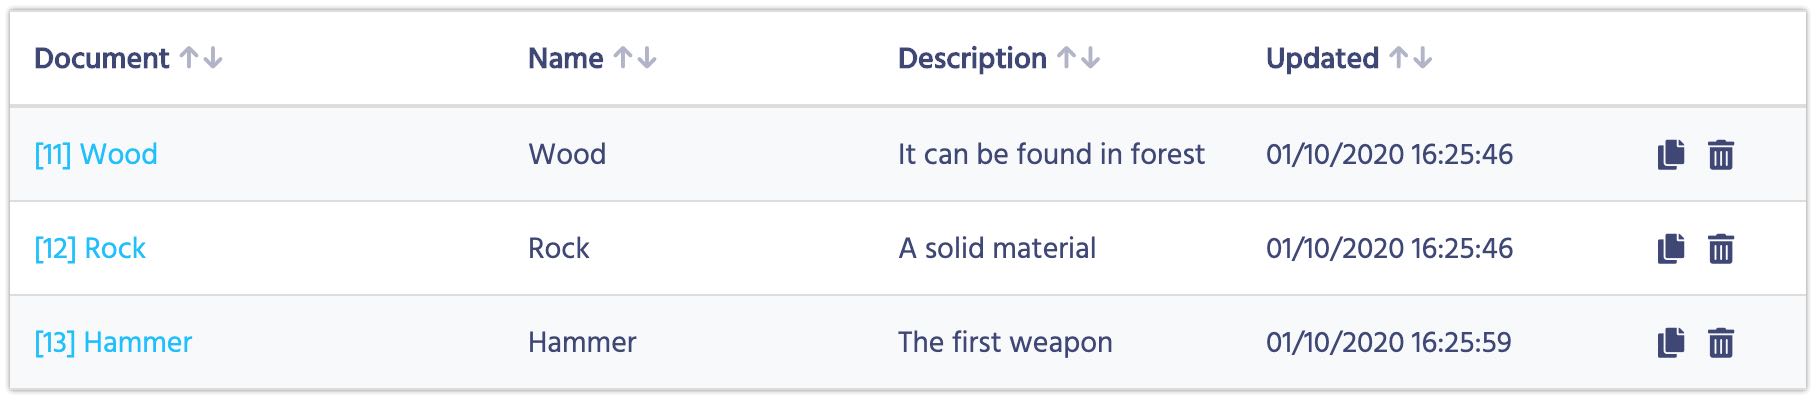
- Click on the Create button to add a new Item
- Create 3 items as shown below:
Now we are going to make a recipe to create a Hammer using a Rock and Wood:
- In the Navigation Panel, select Recipe
- Click on the Create button to add a new Recipe
- Select the Item parameter as Hammer
- Add 2 ingredients: One Wood and one Rock
- It means that to create a Hammer, you need to spend one Wood and one Rock
Ok, we set all the data we need for the test project. Now we need to publish our changes.
Deploy
- Select the Deploy section in the Navigation Panel
- Click Deploy and wait a couple of seconds until it's done
Every time you change the data, it'll be saved only inside the Balancy. If you want to push the changes to the game, you can do that in the Deploy Section. As a programmer, you can think of it as commit/push in the GIT system.
Code Generation
- Assuming you did the basic integration
- Click on Generate Code. It might take several seconds
- Once it's done, you can find a new folder with several scripts created at /Assets/Balancy/AutoGeneratedCode
- Don't change anything in that folder. The changes will be lost with the next generation
Balancy Initialization
- Create a new script DataEditorExample.cs
- Create a new scene and add this script to the Main Camera.
- In the Start method, write the following code:
Balancy.BalancyNewInit.Init(new Balancy.AppConfig
{
   ApiGameId = YOUR_GAME_ID,
   PublicKey = YOUR_PUBLIC_KEY,
   Environment = Balancy.Constants.Environment.Development,
   OnReadyCallback = responseData =>
   {
       Debug.Log("Balancy Initialized: " + responseData.Success);
   }
});
Validate Data
First, let's check if we receive the correct data from Balancy. Add those methods to our script:
private void PrintAllData()
{
    PrintItems();
    PrintRecipes();
}

private void PrintItems()
{
    var items = Balancy.DataEditor.Items;
    Debug.LogWarning("Items Count = " + items.Count);
    foreach (var item in items)
        Debug.Log("ITEM: " + item.Name + " : " + item.Description);
}

private void PrintRecipes()
{
    var recipes = Balancy.DataEditor.Recipes;
    Debug.LogWarning("Recipes Count = " + recipes.Count);
    foreach (var recipe in recipes)
        Debug.Log("RECIPE to create item " + recipe.Item.Name + " requires " + recipe.Ingredients.Length + " other items");
}
Now we need to call PrintAllData once Balancy is initialized. Call this method after the Debug.Log line:
Debug.Log("Balancy Initialized: " + responseData.Success);
PrintAllData();
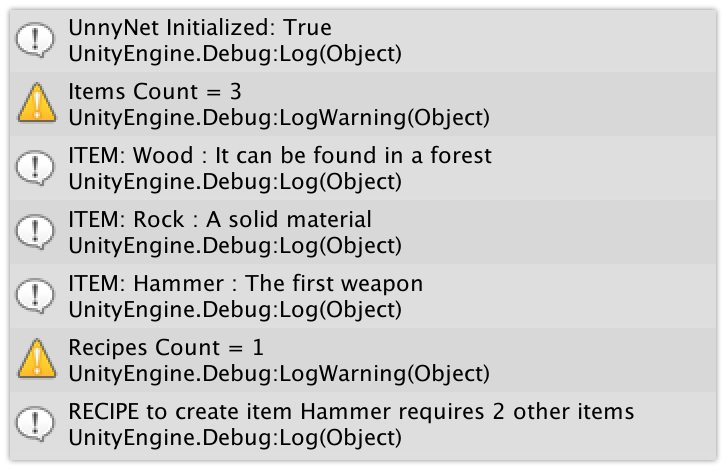
Launch the game, and you should see the following logs in the console:
Write Craft Logic
The next step is to write some logic to store your items and spend items to make craft items. I'll provide the whole code listing so that you can investigate it. Keep in mind that this example was made super easy on purpose. For the actual project, you should organize the code better. And remember to use SOLID principles. Good luck with coding!